Orange muffins with a secret ingredient!

Guess who’s back!! I know, it’s been a long time since my last post, but I started a new adventure. Even though my schedule has been crazier than before, I finally found time to get back to food writing, and I couldn’t be more excited!

Now back to baking. Like many parents, my daughter is picky, and I have a hard time to make her eat new food, whether that is a fruit, veggie or something else. But all kids love sweets, and my daughter is no different. She loves orange flavored desserts and incorporating beets in a muffin was a great idea! For this recipe, I used golden beets, to avoid Anna’s further questions (more like an interrogation!).

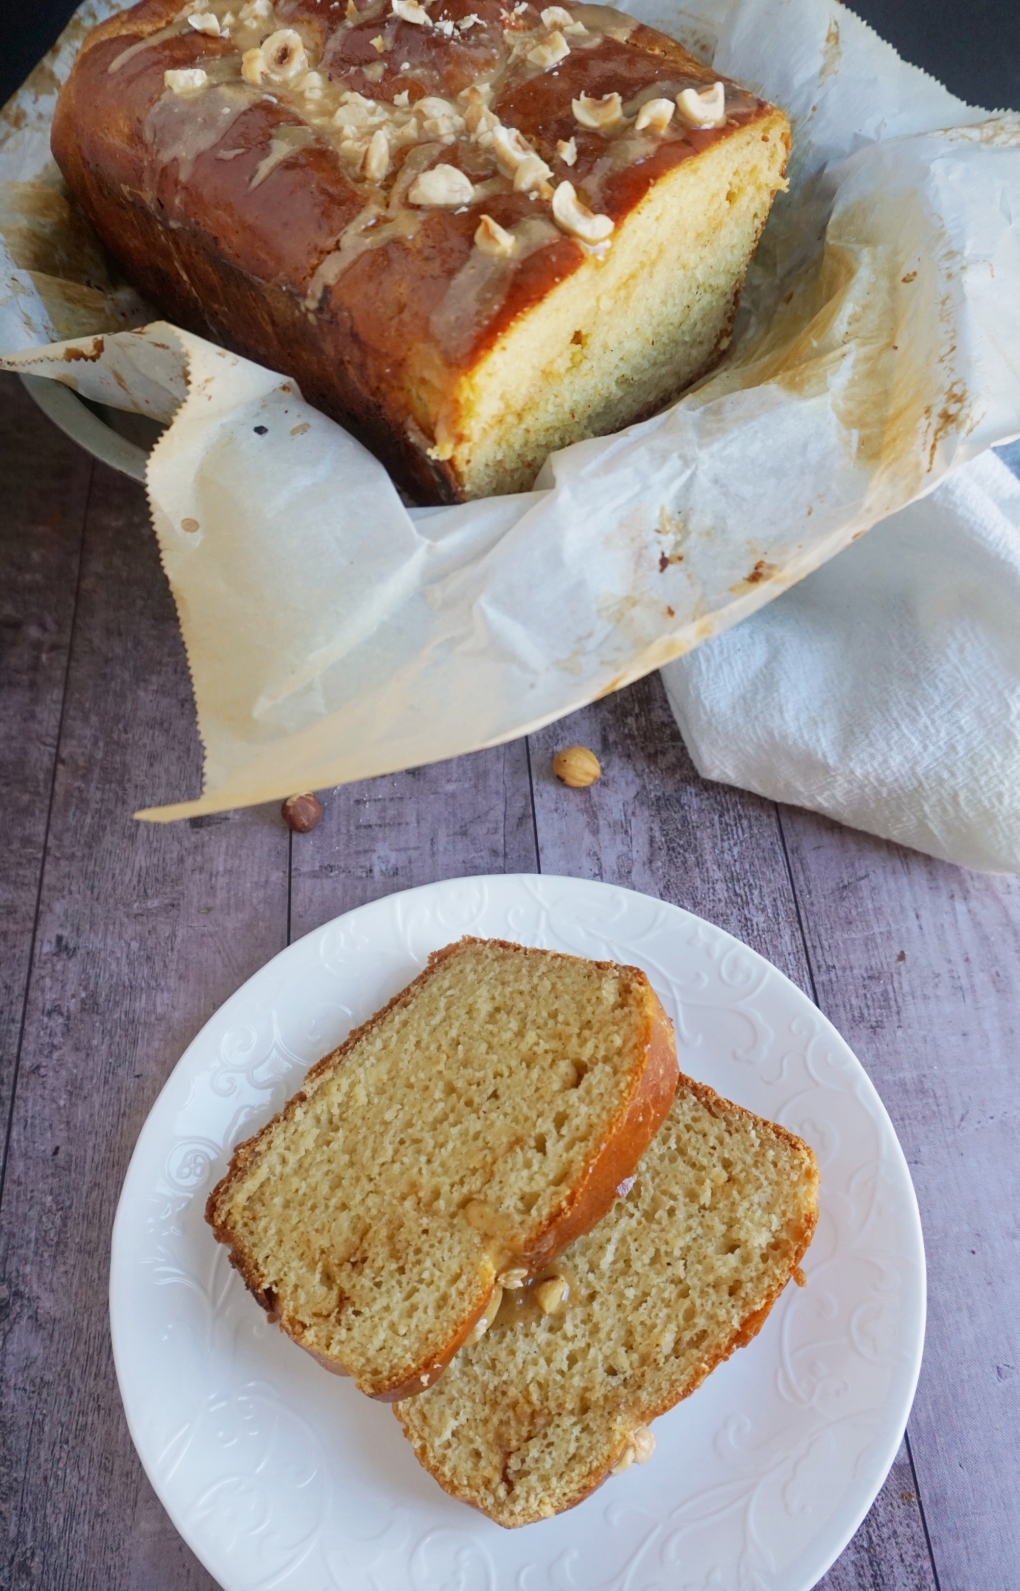
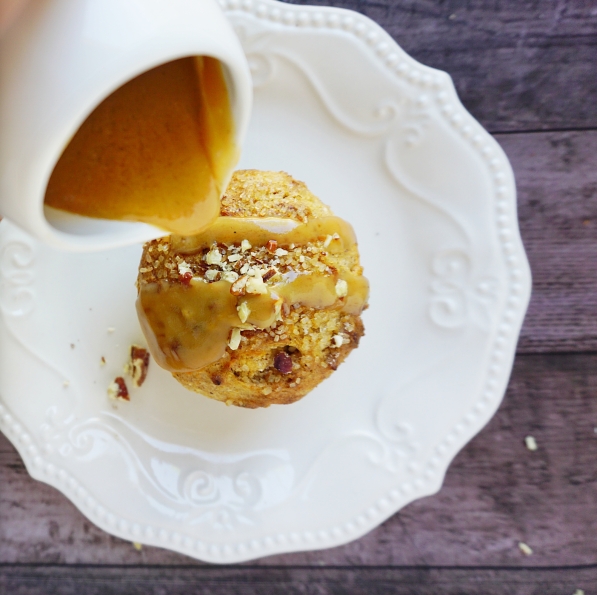
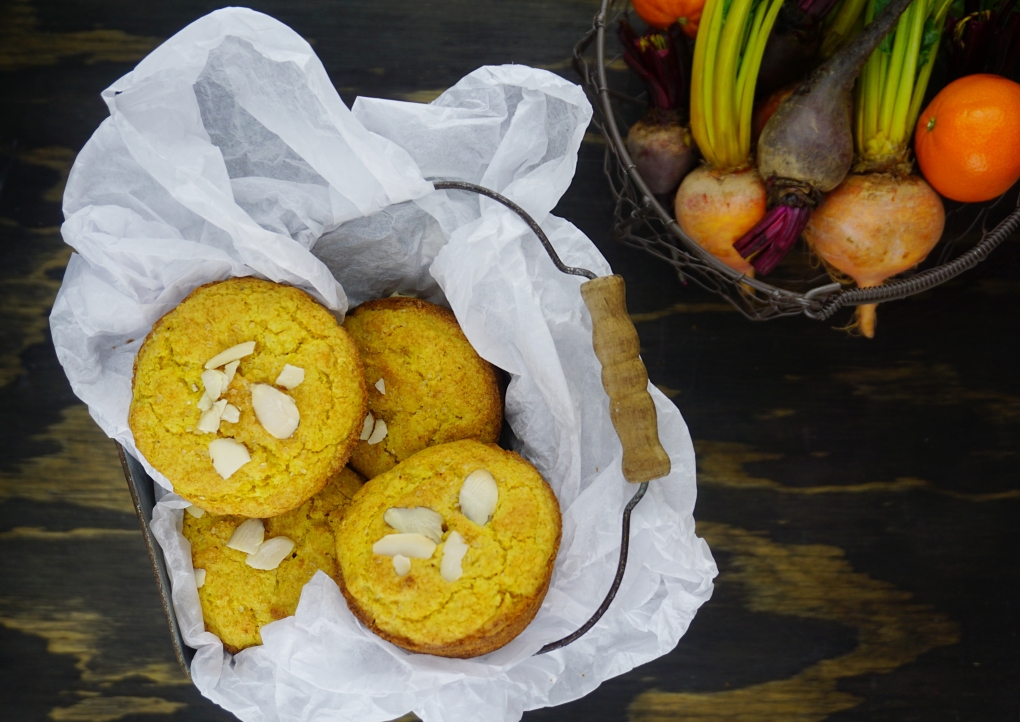
These healthy, fluffy, fragrant muffins are packed with fruity flavor, perfect for breakfast, that will make your little picky eaters asking for more!

beets.jpg

beet muffins4

beet muffins2

beet muffins3


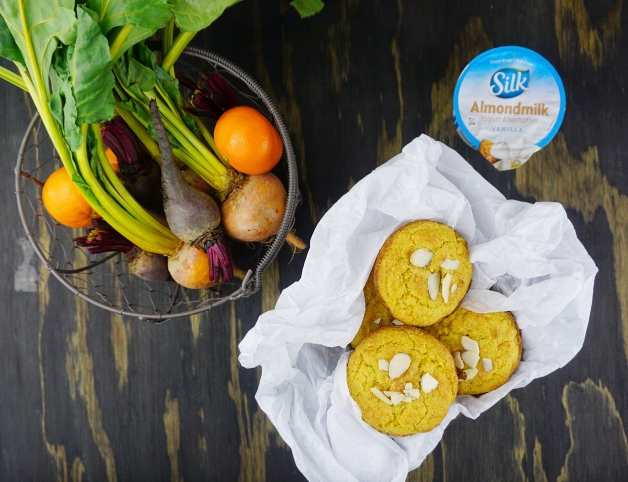
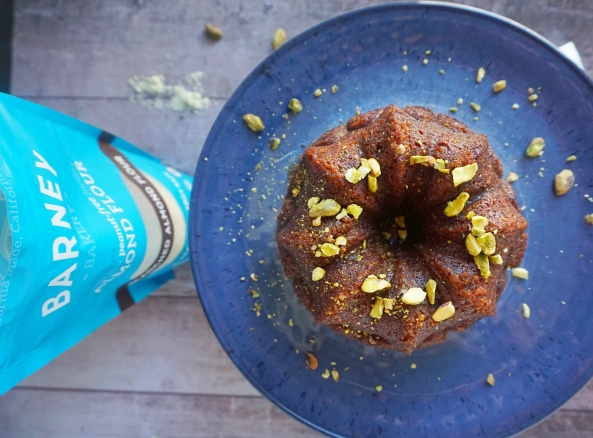
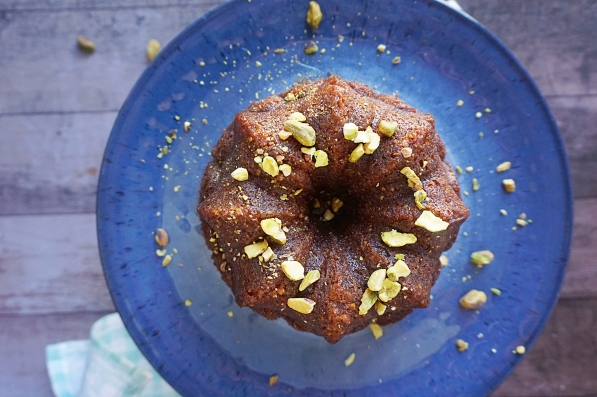
ORANGE MUFFINS WITH A SECRET INGREDIENT!

Yields: 11-12       Baking time: 17-22 minutes        Difficulty: easy

INGREDIENTS:

    • 1 cup golden beets, roasted and peeled
    • Zest and juice of 1 orange
    • 1/3 cup granulated sugar
    • 1/4 cup agave nectar
    • 1/4 cup coconut oil or Vegan butter like Earth Balance
    • 5 oz. applesauce
    • 1/2 cup vegan yogurt
    • 1 teaspoon real vanilla extract
    • 1 cup (5 oz, 140 g) gluten-free flour (like 1 to 1 Bob’s Red Mill baking flour)
    • 1/2 cup (2.5 oz, 65g) almond flour
    • 2 teaspoons baking powder
    • 1.5 teaspoons baking soda
    • 1/4 teaspoon salt

INSTRUCTIONS:

  1. Preheat oven to 350 F and line 12 muffins with paper liners, or lightly grease.
  2. In a  mixing bowl, add the gluten-free flour, almond flour, baking powder, baking soda and salt and set aside.
  3. In another big mixing bowl, add beet puree, applesauce, melted oil,  agave syrup, vanilla extract, orange juice and zest, sugar, and whisk for 45 seconds.
  4. Stir in the vegan yogurt and whisk once more.
  5. Add the dry ingredient mixture and stir with a spoon or spatula until just combined, being careful not to over-mix. If the batter appears too thick, add a touch of almond milk. But it should be quite thick and NOT pourable – rather, scoopable.
  6. Then divide batter evenly among muffin tins (should be enough for between 11-12) and sprinkle with slivered almonds  (optional but recommended).
  7. Bake for 17-22 minutes or until a toothpick inserted into the center comes out clean. Let cool for a few minutes in the pan, remove from tins and let cool on a cooling rack. Will keep covered for several days.

ΜΑΦΙΝΣ ΠΟΡΤΟΚΑΛΙΟΥ ΜΕ ΜΥΣΤΙΚΟ ΥΛΙΚΟ!

Αφράτα και αρωματιστα μάφινς, τέλεια για το πρωινό και όχι μόνο, μέ ένα μυστικό υλικό: πατζάρια! Ναι, πατζάρια! Χρησιμοποίησα χρυσά πατζάρια, καθώς είναι πιο εύκολα να τα βρω στη χωρα που μένω, αλλά μπορείτε να χρησιμοποιήσετε και κανονικά.

pan beet muffins


Μερίδες: 11 με 12     Χρόνος ψησίματος: 17 με 22 λεπτά   Βαθμός δυσκολίας: εύκολο

ΥΛΙΚΑ:

    • 1 κούπα πατζάρια, ψημἐνα στο φούρνο και χωρίς τη φλούδα. (χρησιμοποίησα χρυσά, αλλά φυσικά μπορείτε να χρησιμοποιήσετε και τα κανονικά)
    • Ξύσμα και χυμό από ένα πορτοκάλι
    • 1/3 κούπας κρυσταλλική ζάχαρη
    • 1/4 κούπα σιρόπι αγαυης (ή μέλι αν δεν είναι για βίγκαν)
    • 1/4 κούπας μαργαρίνη ή λάδι καρύδας.
    • 150 γρ. πουρές μήλου
    • 1/2 κούπας γιαούρτι βίγκαν (ή κανονικό αν δεν είναι για βίγκαν)
    • 1 κουταλάκι του γλυκού εκχύλισμα βανίλιας
    • 1 κούπα (140 g) αλεύρι για όλες τις χρήσεις χωρίς γλουτένη
    • 1/2 κούπα (65g) αλεύρι αμυγδάλου
    • 2 κουταλάκια της σούπας baking powder
    • 1.5 κουταλάκια της σούπας μαγειρική σόδα
    • 1/4 κουταλάκι του γλυκού αλάτι

ΕΚΤΕΛΕΣΗ:

  1. Προθερμαίνουμε το φούρνο στους 180 βαθμούς και βάζουμε χαρτινες θήκες σε ενα ταψάκι για μάφινς.
  2. Σε ένα μπωλ, προσθέτουμε το αλεύρι χωρίς γλουτένη, το αμύγδαλο αμυγδάλου, το μπέικιν πάουντερ, μαγειρικη σόδα, και το αλάτι. Ανακατεύουμε και το αφήνουμε στην άκρη.
  3. Σε ένα αλλο μπωλ, προσθέτουμε τον πουρε πατζαριών, τον πουρέ μήλου, το ξύσμα και χυμό πορτοκαλιού, το γιαούρτι, το σιρόπι αγαυης, τη ζάχαρη και το λάδι καρύδας και ανακατευουμε με το συρμα για 45 δευτερολεπτα.
  4. Έπειτα, προσθέτουμε το μείγμα στερεων υλικών  και ανακατεύουμε με μία κουτάλα ή σπάτουλα μέχρι τα αλευρα να ομογενοποιηθούν. ΠΡΟΣΟΧΗ! Μην ανακατέψετε το μείγμα υπερβολικά, διότι θα σκληρυνει και δε θα τρώγεται!Αν το μειγμα ειναι πολυ πηχτο, προσθέτουμε λίγο γάλα αμυγδάλου ή κανονικό.Το μείγμα δεν πρεπει να ειναι πολύ πηχτό.
  5.  Προσθέτουμε το μείγμα στις θήκες και πασπαλίζουμε με λίγο αμύγδαλο φιλέ.
  6. Ψήνουμε για  17-22 λεπτα ή κάνουμε το τεστ της οδοντογλυφίδας. Τα αφήνουμε να κρυώσουν ελαφρά και τα αφαιρούμε από τις θήκες.


beet muffins2


Lime coconut energy balls

coconut lime balls


lime coconut balls


Let’s go a bit tropical today! I know that is still freezing cold outside, but a woman can dream. How many of you love fruity tropical flavors? I love the coconut and citrus flavor combination.

After two months of gluttony and eating sweets pretty much every day, I had to get back on track. I felt like I was losing my desire to be healthy again, so I decided to make these easy yet delicious and without the extra calories.

Enjoy these nutty, sweet and delicious coconut and lime energy balls. You can adjust the lime flavor, or substitute it with lemon, orange or another citrus flavor.


Coconut lime energy balls (gluten-free, vegan)

Yield: 12 balls                 Prep time: 10 minutes

INGREDIENTS:

  • 1/2 cup raw almonds
  • 1/2 cup raw cashews
  • 1 1/2 cup Medjool dates (soak in warm water first if very dry)
  • 2/3 cup unsweetened fine coconut
  • 1/2 teaspoon vanilla extract
  • 2 tbsp fresh lime juice (approx. 3 limes)
  • 1 tsp fresh grated lime zest

INSTRUCTIONS

  1. Place the cashews and almonds in a food processor and mix until mostly broken down.
  2. Add the dates and process until a dough forms.
  3. Add the coconut, vanilla extract and lime and process until well mixed.
  4. Roll into balls and cover them with coconut if desired.  Store them in the fridge in an airtight container.


ΜΠΑΛΕΣ ΕΝΕΡΓΕΙΑΣ ΜΕ ΚΑΡΥΔΑ ΚΑΙ ΛΑΙΜ (vegan, gluten free)

Μερίδες: 12 περίπου μπάλες Χρόνος προετοιμασίας: 10 λεπτά

Μικρές μπάλες ενέργειας καρύδας-λάιμ με 6 μόνο υλικά! Ένα πανεύκολο, νόστιμο σνακ ιδανικό για μικρους και μεγάλους!


ΥΛΙΚΑ:

• 1/ 2 κούπα ωμά αμύγδαλα
• 1/ 2 κούπα ωμά κάσιους
• 1 1/ 2 κούπα μαλακούς χουρμάδες (medjool)
• 1/ 2 κουταλάκι του γλυκού εκχύλισμα βανίλιας
• χυμό και ξύσμα από 3 λάιμ
• 1/ 2 κούπα τριμμένη καρύδα


ΕΚΤΕΛΕΣΗ:

1) Στον κάδο ενός μεγάλου πολυκόφτη (food processor), προσθέτουμε τα αμύγδαλα και κάσιους και τα χτυπάμε μέχρι να θριμματιστούν.
2) Προσθέτουμε τους χουρμάδες, το εκχύλισμα βανίλιας, το ξύσμα και χυμό λάιμ και συνεχίζουμε το χτύπημα μέχρι το μείγμα μας να ομογενοποιηθεί.
3) Πλάθουμε σε μικρές μπάλες και τις καλύπτουμε με την τριμμένη καρύδα.
4) Μπορούμε να τις βάλουμε σε ένα αεροστεγές μπωλ, και να τις αποθηκεύσουμε στο ψυγείο για περίπου 7 ημέρες.

ΣΗΜΕΙΩΣΗ: Για όσους ακολουθούν αυστηροί δίαιτα χωρίς γλουτένη προσέχουμε οι ξηροί καρποί να είναι χωρίς γλουτένη!


Gluten-free faux sourdough bread

A year ago, I experimented with sourdough starter and I admit it was a big failure! Simple gluten-free baking itself is challenging, imagine adding something like a sourdough starter to your bucket list. Long story short, I almost gave up the thought of ever making a sourdough bread.

Thank goodness, I stumbled upon Mandy Lee and her amazing Fraudulent sourdough bread! So easy to make and the secret to the most amazing sourdough bread is yogurt. Yes, yogurt! Due to the difficulty of gluten-free conversion, I had to add butter and milk, to make it a bit more pliable and it worked! Of course, the best part was that Anna, my 5-year-old daughter helped me. She was shaping the dough with so much care, love and dedication. A little baker in the works!

Warm, with a slightly crunchy exterior, this sourdough bread will please the most delicate taste buds!

bread dough

received_10212383050385260


Gluten-free faux sourdough bread

Adapted by Lady and pups

Makes: 1 loaf of bread or boule   Baking time: approx. 40 min.   Difficulty: medium

INGREDIENTS:

  • 2 1/2 cups gluten-free  bread flour mix
  • 1 1/2 tsp salt
  • 1 1/2 tsp instant dry yeast
  • 1 1/2 cup + 2 tbsp  plain Greek yogurt
  • 2 tablespoons butter, melted and cooled
  • 1/4 cup milk

  1. In a stand-mixer with dough-hook, mix bread flour, instant dry yeast, salt, plain yogurt, butter and milk on medium-low speed for 2 min until a dough forms. If the dough is too dry and has difficulty coming together, add 1 tbsp more plain yogurt. Continue to knead the dough on medium-low speed, for a few more minutes until all ingredients come together. The dough should be very sticky, but able to retain shapes.
  2. Cover the bowl with plastic wrap and let ferment at room temperature from 6 to 18 hours (NO MORE than 20 hours or the yogurt may spoil and become bitter!) The dough should almost double when finished.
  3. After fermentation, dust the counter with flour then transfer the dough on top. Use just enough flour to prevent the dough from sticking, fold the dough gently (without crushing all the air bubbles inside) over itself like folding a letter. Turn 90 degrees and fold again. Then shape the dough into a ball-shape. Transfer to a piece of floured parchment paper, then cover a large bowl on top and let proof again for 1- 2 hours. The dough is ready when it almost double in size again.
  4. 45 minutes before the dough’s ready, preheat the oven to 450F/225C with a large dutch oven, or a heavy-bottom pot (both should come with a lid) inside. To bake the bread, lift the parchment paper to transfer the dough to the preheated pot, cover the lid and bake for 30 min. Then remove the lid, and bake until the crust is golden brown.
  5. Let cool on a rack for 20 min.

ΨΩΜΙ ΧΩΡΙΣ ΓΛΟΥΤΕΝΗ ΜΕ ΠΡΟΖΥΜΙ ΓΙΑΟΥΡΤΙΟΥ

received_10212383050385260

Μερίδες: 1 μικρό καρβέλι ψωμί    Χρόνος ψησίματος: περίπου 40 λεπτά  Βαθμός δυσκολίας: μέτριο

Υπέροχο, ζεστό καρβέλι ψωμί με προζύμι γιαουρτιού! 


ΥΛΙΚΑ:

  • 2 1/2-3 κούπες μείγμα αλευριού για ψωμί, χωρίς γλουτένη
  • 1 1/2 κουταλάκι του γλυκού αλάτι
  • 1 κουταλάκι του γλυκού ξηρή μαγιά
  • 1 1/2 cup + 2 κουταλιές της σούπας γιαούρτι
  • 2 κουταλιές της σούπας βούτυρο, λιωμένο και σε θερμοκρασία δωματίου
  • 1/4 κούπας γάλα

  1. Στο μίξερ μας με τον γάτζο, προσθέτουμε και ανακατεύουμε όλα τα υλικά για 2 περίπου λεπτά μέχρι να σχηματιστεί ζύμη. Αν η ζύμη είναι πολύ στεγνή, προσθέτουμε και 1 κουταλιά της σούπας γιαούρτι. Συνεχίζουμε το πλάσιμο σε μέτρια προς χαμηλή ταχύτητα μέχρι να ομογενοποιηθεί. Η ζύμη θα κολλάει στα χέρια, αλλά θα είναι σχετικά εύπλαστη.
  2. Καλύψτε το μπολ με μία μεμβράνη και αφήστε το σε θερμοκρασία δωματίου 6 με 18 ώρες (ΌΧΙ ΠΕΡΙΣΣΟΤΕΡΟ από 20 ώρες επειδή το γιαούρτι θα χαλάσει και θα πικρίσει!) Η ζύμη θα έχει σχεδόν διπλασιαστεί.
  3. Μετά τη ζύμωση, σε αλευρωμένο πάγκο εργασίας,  μεταφέρουμε τη ζύμη. Προσθέτουμε αλεύρι στη ζύμη για να μην κολλάει, διπλώνουμε τη ζύμη ελαφρά, σα να διπλώνουμε γράμμα. Γυρνάμε 90 μοίρες και ξανα διπλώνουμε. Σχηματίστε τη ζύμη σαν μία μπάλα. Μεταφέρετε τη ζύμη σε ένα αλευρωμένο αντικολλητικό χαρτί και σκεπάστε το με το μπωλ και αφηστε το να φουσκώσει ελαφρά για 1- 2 ώρες.  Η ζύμη θα είναι έτοιμη όταν έχει σχεδόν διπλασιαστεί.
  4. 45 λεπτά πριν το τέλος του φουσκώματος της ζύμης, προθερμαίνουμε το φούρνο στους 225C με μία πήλινη γάστρα ή κατσαρόλα ή βαθύ ταψί με καπάκι. Για να ψήσουμε το ψωμί, σηκώνουμε το αντικολλητικό χαρτί προσεκτικά και το μεταφέρουμε στην καυτή γάστρα, σκεπάστε με το καπάκι και ψήστε για 30 λεπτά. Αφαιρέστε το καπάκι και ψήστε μέχρι  το ψωμί να αποκτήσει ένα χρυσοκαστανό χρώμα.
  5. Αφήστε το να κρυώσει για 20 λεπτά.

Gluten-free oat chocolate chip cookies

Cookies are by far my daughter’s favorite sweet snack among others. She loves a nice soft chocolate chip cookie, but not just buying them, but making them. Making our countertop messy, laughing our hearts out and making memories!

I wanted to make them vegan yet delicious. So, my brother sent me this recipe from Vegan Sintages and I had to try them out! Incredibly delicious, soft with a nice crunch and of course orange kick because Anna loves orange flavor. Dank them in a cup of milk, or with your coffee.

oat choco cookie


oat choco cookies2


pan oat choco chips


Gluten-free oat chocolate chip cookies

Makes: a dozen        Baking time: 10-12 minutes    Difficulty: easy

INGREDIENTS:

  • a medium ripe banana, mashed
  • 1/3 cup sunflower oil
  • 2/3 cup light brown sugar
  • 1 teaspoon vanilla extract
  • 3/4 cup+ 2 tablespoons gluten-free all-purpose  flour
  • 1/2 teaspoon baking soda
  • 3/4 teaspoon baking powder
  • 1/4 teaspoon salt
  • 1 teaspoon orange zest
  • 1/4 teaspoon ground cinnamon
  • 1 1/2-2 cups gluten-free oat flour
  • 1/2 cup chopped almonds
  • 1/2 cup vegan and gluten-free chocolate chips

INSTRUCTIONS:

  1. Preheat oven to 350 F/ 180 C. Line a cookie sheet with parchment paper and set aside.
  2. In a medium bowl smash banana, add oil, sugar, orange zest and vanilla extract. Whisk until well combined.
  3. Add gluten-free flour, baking soda, baking powder cinnamon, salt and gluten-free oat flour. Mix well with a wooden spoon until thoroughly incorporated.
  4. Lastly, add chopped almonds and chocolate chip cookies and mix.
  5. With an ice cream scoop, form balls put them on the baking sheet couple inches apart, gently press them on top and bake for 10-12 minutes until golden brown. Let them cool down for 2 minutes and enjoy!

Μπισκότα βρώμης με σταγόνες σοκολάτας

Αυτά τα μπισκότα είναι τόσο εύκολα και νόστιμα, που μέχρι και η πεντάχρονη κόρη μου τα λάτρεψε! Μαλακά, αφράτα και όσο πιο υγιεινά γίνεται με την προσθήκη μπανάνας.

pan oat choco chips


Βγαίνουν: μία ντουζίνα     Χρόνος ψησίματος: 10-12 λεπτά   Βαθμός δυσκολίας: εύκολο

ΥΛΙΚΑ:

  • 1 μέτρια ώριμη μπανάνα
  • 1/3 της κούπας ηλιέλαιο
  • 2/3 της κούπας καστανή ζάχαρη
  • 1 κουταλάκι του γλυκού εκχύλισμα βανίλιας
  • 3/4 της κούπας συν 2 κ.τ.σ. αλεύρι για όλες τις χρήσεις
  • ½ κ.τ.γ. μαγειρική σόδα
  • 3/4 κουταλάκι του γλυκού  baking powder
  • 1 κουταλάκι του γλυκού ξύσμα πορτοκαλιού
  • ¼ κ.τ.γ. αλάτι
  • ¼ κ.τ.γ. κανέλα
  • 2 κούπες αλεύρι  βρώμης χωρίς γλουτένη
  • ½ κούπα τριμμένα αμύγδαλα
  • ½ κούπα σταγόνες σοκολάτας υγείας

ΕΚΤΕΛΕΣΗ:

  1. Προθερμαίνουμε το φούρνο στους 180 βαθμούς. Στρώνουμε αντικολλητικό χαρτί σε ένα ταψί και το αφήνουμε στην άκρη.
  2.  Σε ένα μπολ, λιώνουμε τη μπανάνα με το πηρούνι και προσθέτουμε το λάδι, τη ζάχαρη, το ξύσμα, τη βανίλια και ανακατεύουμε καλά.
  3.  Προσθέτουμε αλεύρι για όλες τις χρήσεις, σόδα, αλάτι, baking powder
  4. κανέλα και αλεύρι βρώμης, ανακατεύουμε μέχρι όλα τα υλικά να ομογενοποιηθούν.
  5. Προσθέτουμε  το αμύγδαλο, και τις σταγόνες σοκολάτας και ανακατεύουμε καλά.
  6.  Με ένα σκοπθ παγωτού πλάθουμε μπαλες και τις βάζουμε στο ταψί σε αποσταση η μία από την άλλη. Τις πατάμε ελαφρώς.
  7.  Ψήνουμε για 10-12 λεπτά μέχρι να αρχίσουν να ροδοκοκκινίσουν. Αφήνουμε να κρυώσουν για 2 λεπτά και είναι έτοιμα να τα απολαύσουμε.


oat choco cookie


Gluten-free​ apple rose rolls

I’ve seen it everywhere, yet I couldn’t taste it, couldn’t even make it for my loved ones. I’m talking about these beautiful apple roses made with puff pastry. One of the struggles of being a celiac patient is not only cross-contamination but not been able to taste what am I making. Sometimes, when I’m making something non-gluten -free I have to guess and go with my experience.

So, instead of puff pastry, I used my cinnamon roll dough, which is easy to make and delicious! I filled them with apricot jam, orange zest, and cinnamon. Perfect for breakfast, or to impress your guests.


rose tarts


rose tarts2

Gluten-free apple roses

Makes: 8       Cooking time: 25 minutes      Difficulty: easy

INGREDIENTS:

  • 1 batch cinnamon roll dough
  • 2 medium apples
  • 3 tablespoons apricot jam
  • juice of a half a lemon
  • 2 tablespoons orange juice
  • zest from half an orange (optional)
  • 1/2 teaspoon ground cinnamon (or more if you love cinnamon)
  • powder sugar to sprinkle

INSTRUCTIONS:

  1. Prepare cinnamon roll dough according to instructions.
  2. Prepare a bowl half filled with water and the orange juice. Cut the apples in half, remove the core and cut the apples into paper-thin slices. Leave the peel so it will give the red color to your roses. Right away, place the sliced apples in the bowl so that they won’t change color.
  3. Microwave the apples in the bowl for about 3 minutes, to make them slightly softer and easy to roll.  If you prefer, you can also simmer the apple slices with the water in a small pan (on the stove). The apple slices should be cooked just enough to bend without breaking. If they break, you need to cook them a little more.
  4. On a well-floured surface, roll the dough in approximately 1/4 of an inch thick in a rectangular shape of about 12 x 9 inch (30 x 22 cm). Cut the dough into 6 strips, each about 2 x 9 inch (5 x 22 cm).
  5. In a bowl, place three tablespoons of apricot jam with the orange juice and zest, and add the cinnamon. Microwave for about one minute (or warm up on the stove) so that the jam will be easier to spread. Spread a thin layer of jam on each strip of dough.
  6. Preheat the oven to 375°F (190°C). Drain the apples.
  7. Arrange the apple slices on the dough, overlapping one another. Make sure the top (skin side) of the slices sticks a little out of the strip. Sprinkle with cinnamon.
  8. Fold up the bottom part of the dough.
  9. Starting from one end, carefully roll the dough, keeping the apple slices in place. Seal the edge at the end, pressing with your finger, and place in a regular muffin cup. No need to grease the muffin mold if it’s silicone. Otherwise, make sure to grease with butter and flour (or spray).
  10. Do the same for all 6 roses. Bake at 375°F (190°C) for about 40-45 minutes, until fully cooked.
  11. If the apples start to burn on top, move the pan to a lower rack of the oven and finish baking. You can also cover loosely with aluminum foil for the last 10-15 minutes, to avoid burning the top. Sprinkle with powdered sugar and enjoy!

    Μηλοπιτάκια τριαντάφυλλο χωρίς γλουτένη

Ατομικά, εύκολα και νόστιμα μηλοπιτάκια χωρίς γλουτένη σε σχήμα τριαντάφυλλο. Είναι τόσο εντυπωσιακά που δε θες να τα αγγίξεις, για να μην τα χαλάσεις!

rose tarts2

Μερίδες: 8      Χρόνος ψησίματος: 25 με 30 λεπτά       Βαθμός δυσκολίας: εύκολο

ΥΛΙΚΑ:

  • 1 δόση ζύμη για ρολά κανέλας
  • 2 μέτρια μήλα
  • 3 κουταλιές της σούπας μαρμελάδα βερίκοκο
  • χυμό από μισό λεμόνι
  • 2 κουταλιές της σούπας χυμό πορτοκάλι
  • ξύσμα απο μισό πορτοκάλι (προεραιτικό)
  • 1/2 κουταλάκι του γλυκού κανέλα (ή περισσότερο αν θέλετε)
  • ζάχαρη άχνη για πασπάλισμα

ΕΚΤΕΛΕΣΗ:

  1. Προετοιμάστε τη ζύμη σύμφωνα με τις οδηγίες.
  2. Γεμίζουμε ένα μπωλ με νερό, μέχρι τη μέση και προσθέτουμε το χυμό λεμόνι. Κόβουμε τα μήλα στη μέση, αφαιρούμε το κοτσάνι και τα κουκούτσια, δημιουργώντας ένα μικρό αυλάκι και κόβουμε τα μήλα σε λεπτές φέτες. Αφήνουμε τη φλούδα για να δώσει χρώμα στα ρολά μας. Μόλις τα κόψουμε, τα βάζουμε αμέσως στο μπωλ με το νερό για να μην αλλάξει το χρώμα.
  3. Βάλτε το μπωλ στο φουρνο μικροκυμάτων για 3 λεπτά μέχρι να μαλακώσουν. Εναλλακτικά, μπορείτε να τα βάλετε σε ένα κατσαρολάκι, σε χαμηλή φωτιά και αφήστε τα να μαλακώσουν. Τα μήλα θα πρέπει να είναι μαλακά, ευλίγιστα χωρίς να σπάνε. Αν σπάνε τότε χρειάζονται περισσότερο βράσιμο.
  4. Σε μια καλά αλευρωμένη επιφάνεια εργασίας, ανοίγουμε τη ζύμη μας σε φύλλο πάχους μισού εκατοστού σε παραλληλόγραμο σχήμα 30 x 22 εκατοστών. Κόβουμε τη ζύμη  σε 6 λωρίδες, περίπου 5 x 22 εκ. έκαστη.
  5. Σε ένα μπωλ, βάζουμε τη μαρμελάδα βερίκοκο, το χυμό και ξύσμα πορτοκαλι και την κανέλα και το βάζουμε στο φούρνο μικροκυμάτων για 1 περίπου λεπτό μέχρι η μαρμελάδα να μαλακώσει. Αλλείψτε λίγο από το μείγμα μαρμελάδας στη λωρίδα ζύμης.
  6. Προθερμαίνουμε το φούρνο στους 190°C. Σουρώνουμε τα μήλα.
  7. Αρχίζουμε να απλώνουμε στο πάνω μέρος του φύλλου και κατά μήκος του, τις φέτες του μήλου. Τις απλώνουμε με τέτοιο τρόπο  ώστε η μία να επικαλύπτει κατά το ήμισυ την άλλη. Δεν τις τοποθετούμε στο κάτω μέρος του φύλλου ζύμης, αλλά τις βάζουμε από τη μέση και πάνω ώστε να μπορέσουμε στη συνέχεια να τις τυλίξουμε μέσα σε αυτό. Προσέχουμε δηλαδή να προεξέχουν οι φέτες του μήλου κατά το ήμισυ πάνω από τη λωρίδα ζύμης.
  8. Στη συνέχεια κλείνουμε τα μήλα μέσα στη ζύμη σκεπάζοντάς τα με το κάτω μέρος της που έχει μείνει ακάλυπτο. Τέλος παίρνουμε την μια άκρη της και αρχίζουμε να την τυλίγουμε δημιουργώντας έτσι μια σπείρα. 
  9. Ψήνουμε για περίπου 25 με 30 λεπτά.
  10. Αν τα μήλα αρχίζουν να παίρνουν έντονο χρώμα, καλύψτε τα με αλουμινόχαρτο για τα τελευταια 10-15 λεπτά, για να μην καούν. Πασπαλίζουμε με ζάχαρη άχνη.

Gluten-free pear almond pie

As the weather gets colder here in Las Vegas, my desire for pies gets stronger and stronger. Pies with fruity, floral and fragrant filling are my favorite, maybe I love them more than I should because I can eat a pie in one sitting and I don’t exaggerate!

One of the most delicate flavor combinations is almond and pear. Not so popular, with the soft juicy pears being so subtle yet burst with flavor! I had to treat them nice and gentle, so I chose to make a vegan almond pear pie, paired beautifully with nutty almond paste, Earth Balance Butter and lots of love!

What’s your favorite kind of pie?

pear piepear pie2

pear pies 2

Makes: 4 four inch tarts       Cooking time: 25 minutes        Difficulty: easy
INGREDIENTS:
For the crust:
  • 2 1/2 cups gluten-free all purpose flour or 1to1
  • 1 teaspoon salt
  • 1 teaspoon sugar
  • 1 cup cold unsalted vegan butter( or regular), cut into small cubes
  • 1/4 to 1/2 cup ice water

For the filling:

  • 1 package almond paste
  • 2 -3 Bosc pears (or any soft and juicy pears)
  • zest and juice of an orange
  • 1/2 teaspoon ground cinnamon
  • 3 TBSPS agave nectar or maple syrup or light brown sugar

DIRECTIONS:

  1. First, we make the crust: In a bowl of food processor add flour, salt, and sugar, and pulse to combine. Add butter, and process for about 10 seconds, or just until the mixture resembles coarse meal. 
  2. Add ice water, tablespoon by tablespoon (1/4 to 1/2 cup), through the feed tube with machine running, just until the dough holds together without being wet or sticky; do not process more than 30 seconds. Test the dough at this point by squeezing a small amount together. If it is crumbly, add a bit more water. 
  3. Divide dough into 4 quarters, and wrap each half in plastic wrap, using a rolling pin to flatten into a disk. Chill for 15 minutes.
  4. Make the pear filling: Peel and remove core and seeds, and cut into thin slices. In a medium bowl, add pears and all the ingredients except marzipan. Stir and let them macerate for 10 minutes.
  5. Preheat oven to 400 F. On a baking sheet, line 4 four inch baking paper pans. Take pie dough out of the fridge, and roll each quarter between two pieces of parchment paper.  Dust with some flour if needed.
  6. Place each rolled dough into the pan, add a ball of almond paste and flatten it. Lay on top the pear filling by making a pattern. It doesn’t have to be perfect. Pour some of the juices from the filling into each tart. You can make some decoration with the remaining pie crust.
  7. Brush the top of the pie decoration with some nut milk and bake for 25 minutes or until pie decoration is golden.

ΤΑΡΤΕΣ ΜΕ ΑΜΥΓΔΑΛΟ ΚΑΙ ΑΧΛΑΔΙ

Βγαίνουν: 4 μικρές τάρτες      Χρόνος ψησίματος: 25 minutes     Βαθμός δυσκολίας: εύκολο
Αρωματική και νόστιμη τάρτα με ζουμερά αχλάδια και αμυγδαλόπαστα! 
pear marzipan pie
ΥΛΙΚΑ:
Για τη ζύμη:
  • 2 1/2 κούπες αλεύρι χωρίς γλουτένη για όλες τις χρήσεις
  • 1 κουταλάκι του γλυκού αλάτι
  • 1 κουταλάκι του γλυκού ζάχαρη
  • 1 κούπα κρύο ανάλατο φυτικό βούτυρο (ή κανονικό), κομμένο σε μικρά κομμάτια
  • 1/4 με 1/2 κούπα παγωμένο νερό

Για τη γέμιση:

  • 220 γραμμ. πάστα αμυγδάλου
  • 2 -3 μεγάλα αχλάδια μαλακά
  • ξύσμα και χυμός από ένα πορτοκάλι
  • 1/2 κουταλάκι του γλυκού κανέλα σε σκόνη
  • 3 κουταλιές της σούπας σιρόπι αγαύης ή σφένδαμου ή καστανή ζάχαρη

ΕΚΤΕΛΕΣΗ:

  1. Πρώτα, φτιάχνουμε τη ζύμη: Στο μπωλ του food processor (μεγάλου πολυκόφτη) προσθέτουμε το αλεύρι, το αλάτι και τη ζάχαρη, και πατάμε για λίγα δευτερόλεπτα μέχρι να ενωθούν τα υλικά. Προσθέτουμε το βούτυρο, και χτυπάμε 10 δευτερόλεπτα, ή μέχρι το μείγμα να μοιάζει με υγρή άμμο.
  2. Προσθέστε το παγωμένο νερό σταδιακά, μία κουταλιά της σούπας κάθε φορά (1/4 με 1/2 κούπα), από την υποδοχή στο καπάκι, μέχρι να ομογενοποιηθεί η ζύμηκαι να μην κολλάει στα τοιχώματα. Μην την ανακατέψετε περισσότερο απο 30 δευτερόλεπτα. Αν η ζύμη τρίβεται, προσθέστε λίγο νερό.
  3. Μοιράστε τη ζύμη σε 4 κομμάτια, και τυλίξτε τα με μεβράνη και με τον πλάστη το πλάθουμε ελαφρά μέχρι να σχηματιστεί δίσκος. Βάλτε τα στο ψυγείο για 15 λεπτά.
  4. Φτιάχνουμε τη γέμιση: Ξεφλουδίζουμε τα αχλάδια, αφαιρούμε τα κοτσάνια και τα σπόρια, και τα κόβουμε σε λεπτές φέτες μισού εκατοστού.Σε ένα μπωλ, βάζουμε όλα τα υλικά εκτός από την πάστα αμυγδάλου (μάρζιπαν). Ανακατεύουμε και το αφήνουμε στην άκρη για 10 λεπτά.
  5. Προθερμαίνουμε τον φούρνο στους 200 C. Σε ένα μεγάλο ταψί τοποθετούμε 4 μικρά χάρτινα θηκάκια για τάρτες ή μπορεούμε να χρησίμοποιήσουμε κανονικά (όχι χάρτινα). Παίρνουμε το κάθε κομμάτι ζύμης και την ανοίγουμε ανάμεσα σε 2 φύλλα αντικολλητικού χαρτιού. Πασπαλίζουμε με λίγο αλεύρι, αν χρειαστεί.
  6. Τοποθετείστε το κάθε φύλλο ζύμης στα ταψάκια, πάρτε μία μικρή μπάλα από την πάστα αμυγδάλου, πατήστε το και τοποθετείστε το μέσα στο ταψάκι με τη ζύμη. Τοποθετείστε όσο ομοιόμορφα γίνεται, τα αχλάδια, περιχύστε το υγρό από τη γέμιση πάνω από την τάρτα. Μπορείτε να κάνετε διάφορα σχέδια με την υπόλοιπη ζύμη.
  7. Αλείψτε με λίγο γάλα αμυγδάλου από πάνω και ψήστε για 25 περίπου λεπτά ή μέχρι οι τάρτες να ροδοκοκκινίσουν.

Gluten-free​ hazelnut praline brioche


It’s known to my family and closest friends that I love making anything that has to do with dough, specifically bread. Being a celiac patient it’s a bit challenging, I’m stubborn though and I manage to conquer my fears and never give up. That comes with numerous failures.

I made this brioche so many times: as tsoureki (Greek Easter sweet bread) filled with chocolate, as donuts, and as baklava. Now, it’s time to jazz it up a bit and be nutty by using my homemade hazelnut praline paste! Slightly sweet, fluffy, gluten-free hazelnut praline brioche, with orange notes. Perfect for breakfast with a cup of tea or coffee.

Are you ready?

praline brioche

brioche praline


praline4


Gluten-free hazelnut praline brioche

Makes: 3 small loaves or 1 big             Cooking time: 40-45 minutes     Difficulty: medium


INGREDIENTS:

  • 2 teaspoons instant  yeast
  • 1 tablespoon + 2 teaspoons granulated sugar
  • 3/4 cup + 2 tablespoons + 1¾ teaspoons warm water, at 75°F/23.8°C
  • 3 cups (400 grams) gluten-free 1 to 1 baking flour
  • 1 1/2 teaspoon kosher salt
  • juice and zest from half an orange
  • 3 eggs and  1 yolk
  • 1/4 cup (80 grams)  honey
  • 3.5 ounces (100 grams – 7 tablespoons) unsalted butter, melted and cooled
  • 1/3 cup hazelnut praline paste+ little bit more for drizzling on top
  • 1 egg for the egg wash


INSTRUCTIONS:

  1. Combine the yeast and sugar in a small bowl. Stir in the warm water, and set in a warm place for 10 minutes. The mixture will be foaming and bubbly.
  2. Combine the flour and salt in the bowl of a stand mixer fitted with the paddle attachment.  In a medium bowl, whisk together the eggs, orange juice and zest, mahlab powder, yolk, honey, butter, and proofed yeast mixture.
  3. Add the egg mixture to the flour in a steady stream with the mixer running on low. Increase the speed to medium and mix the dough for 10 minutes. It will be very silky, almost like a cake batter.
  4. Scrape down the sides of the bowl and cover it with plastic wrap. Allow it to rise in a warm place for an hour, the dough should about double in size.
  5. Using a rubber spatula, deflate the dough, turning it over a few times in the bowl. Scrape down the sides of the bowl, recover the bowl with plastic wrap, and refrigerate for 2 hours.
  6. Spray a loaf pan with nonstick spray. Fold in the praline paste, It doesn’t have to be incorporated completely. Add dough to the pan and brush with the egg wash and sprinkle with a little bit of sugar or some salt if you like. Set the pan somewhere warm for 40 minutes. You want the dough to rise and spread – but it will not double, so don’t let it sit for longer waiting for that.
  7. When you have about 10 minutes left of rising time, heat up your oven to 350°F. Bake your rolls for 40-45 minutes. You want the top to be golden and a toothpick to come out clean when it is inserted into the middle.
    Transfer to a cooling rack to cool completely. Drizzle with some extra praline paste on top and chopped hazelnuts.

Γαλλικό ψωμί μπριος με πραλίνα φουντουκιού

Μερίδες: 4 με 6           Χρόνος ψησίματος: 40-45 λεπτά          Βαθμός δυσκολίας: εύκολο

Μαλακό, βουτυρένιο και αρωματικό  γλυκο γαλλικό ψωμί μπριος, με σπιτική πραλίνα φουντουκιού.  Θα τα λατρέψουν μικροί και μεγάλοι!

brioche praline


ΥΛΙΚΑ:

  • 2 κουταλάκια του γλυκού ξηρή μαγιά, χωρίς γλουτένη
  • 1 κουταλιά της σούπας +2 κουταλάκια του γλυκού κρυσταλλική ζάχαρη
  • 3/4 κούπας + 2 κ + 1¾ κουταλιές της σούπας ζεστό νερό (όχι καυτό!)
  • 3 κούπες αλεύρι για όλες τις χρήσεις, χωρίς γλουτένη
  • 1 1/2 κουταλάκι του γλυκού αλάτι
  • χυμό και ξύσμα από μισό πορτοκάλι
  • 3 αυγά και 1 κρόκο,σε θερμοκρασία δωματίου
  • 1/4 κούπα (80 γραμ) μέλι
  • 100 γραμ. αγελαδινό βούτυρο,λιωμένο. Το αφήνουμε να έρθει σε θερμοκρασία δωματίου.
  • 1/3 κούπας σπιτική πραλίνα φουντουκιού+ για λίγο πασπάλισμα
  • 1 αυγό για το  άλλειμμα

ΕΚΤΕΛΕΣΗ:

  1. Σε ένα μικρό μπωλ,συνδυάζουμε τη μαγιά, ζάχαρη και νερό. Αναδεύμουμε και το αφήνουμε για 10 λεπτά μέχρι να ενεργοποιηθεί η μαγιά και αφρίσει.
  2. Στον κάδο του μίξερ ρίχνουμε το αλεύρι και το αλάτι. Σε ένα μεσαίο μπωλ, ρίχνουμε τα αυγά, τον κρόκο αυγού, το λιωμένο βούτυρο,χυμό και ξύσμα πορτοκαλιού,μέλι και τη μαγιά.
  3. Προσθέτουμε το μείγμα αυγού στο αλεύρι σιγά σιγά σε χαμηλή ροή και χτυπάμε σε χαμηλή ταχύτητα. Αυξάνουμε σταδιακά την ταχύτητα στη μεσαία και χτυπάμε για 10 λεπτά. Το μείγμα θα μοιάζει με πηχτή ζύμη για κέικ.
  4. Με μια λαστιχένια σπάτουλα ξύστε τις άκρες του μπωλ,καλύψτε το με μία μεμβράνη και αφήστε το να φουσκώσει για μία ώρα. Η ζύμη θα διπλασιαστεί.
  5. Με μια λαστιχένια σπάτουλα, ξεφουσκώστε τη ζύμη και ανακατέψτε τη από κάτω προς τα πάνψ απαλά 2 με 3 φορες. Καλύψτε ξανά το μπψλ με τη μεμβράνη και βάλτε το στο ψυγείο για 2 ώρες.
  6. Μετά από 2 ώρες, βγάλτε το από το ψυγείο. Βουτυρώστε καλά μία μακρόστενη φόρμα για κέικ. Προσθέστε την πραλίνα φουντουκιού και με μία σπάτουλα σιλικόνης, ανακατέψτε ελαφρά, από κάτω προς τα πάνω. Δε χρειάζεται να ομογενοποιηθεί το μείγμα.Προσθέστε τη ζύμη μπριός στο ταψί.
  7. Αλλείψτε με το χτυπημένο αυγό,πασπαλίστε με λίγη ζάχαρη ή αλάτι και αφήστε το στην άκρη για 40 λεπτά σε ζεστό μέρος. Η ζύμη θα απλωθεί και θα φουσκώσει ελαφρά,αλλά δε θα διαπλασιαστεί. Τα τελευταία 10 λεπτά, ανάψτε το φούρνο στους 180 βραθμούς.
  8. Ψήστε το για  40-45 λεπτά μέχρι να ροδοκοκκινίσει. Μόλις είναι έτοιμο το αφήνετε να κρυώσει και πασπαλίστε με λίγη ακόμα πραλίνα φουντουκιού και ψιλοκομμένα φουντούκια.

ΣΗΜΕΙΩΣΗ:

∗Το κάθε αλεύρι χωρίς γλουτένη ειναι διαφορετικό. Για τη συγκεκριμένη συνταγή διαλέξτε αλεύρι για ψωμί,κατάλληλο για τσουρέκια και παρόμοιες ζύμες.

praline brioche2


Gluten-free pistachio ravani (Syrupy pistachio polenta cake)


pan ravani

barney ravani

ravani piece2

Today’s recipe is taking me down to memory lane. Back in Greece where I was cooking and baking with my parents, messing up the kitchen just a bit and still eating gluten.

Ravani is a semolina cake infused with syrup. Due to my celiac, I can’t enjoy this cake as is, so I converted into a gluten-free goodness! I substituted semolina with Barney Butter powder-like almond flour, grounded pistachios, and gluten-free polenta. BE CAREFUL! Just because polenta is made of corn that does not necessarily mean that is gluten-free. Always look for the gluten-free logo.

There is a bit of a booze there, too but alcohol evaporates. Moist, nutty with floral notes and just the right amount of sweetness!


Gluten-free pistachio ravani (Syrupy pistachio polenta cake)

Serving: 8-10               Cooking time: 45 minutes                      Difficulty: easy

Adapted from Tante Kiki

For the cake:

  • 130 grams raw pistachios, grounded
  • 70 grams gluten-free polenta
  • 100 grams Barney Butter almond flour
  • 96 grams gluten free all purpose flour
  • 100 grams granulated sugar
  • 300 ml orange juice
  • 125 ml olive oil
  • 2 tablespoons orange zest
  • 2 teaspoons baking powder
  • 1/2 teaspoon baking soda
  • 1 teaspoon vanilla extract
  • 4 tablespoons rum
  • 1/4 teaspoon salt

For the syrup:

  • 700 ml or 3 cups water
  • 650 grams or 3 cups sugar
  • 1 cinnamon stick
  • 1/2 cup orange juice

INSTRUCTIONS:

  1. Preheat oven to 190 C/375 F. Grease a bundt cake pan and dust it with some flour. Set aside.
  2. In a medium bowl combine the dry ingredients: gluten-free flour, polenta, almond flour, pistachios, salt, and baking powder.
  3. In a different bowl combine wet ingredients: orange juice and zest, olive oil, rum vanilla extract and sugar and with a hand mixer, beat them until sugar dissolves and the mixture is homogenous.
  4. Lower speed and add dry ingredients to the wet gradually until cake batter thickens and is well combined. Pour mixture into the cake pan and bake for 30-40 minutes.
  5. While cake is baking prepare the syrup: In a sauce pot, add all the syrup ingredients and boil over a medium-high heat for 8 minutes.
  6. Remove cake from the oven and with a ladle pour carefully half of the syrup over hot cake.
  7. Put it back in the oven for 5 minutes.
  8. Remove cake completely out of the oven and with a skewer prick cake, pour slowly and gradually rest of the syrup over cake and let the cake absorb all the syrup. Let it cool down completely, before serving!

ΡΑΒΑΝΙ ΝΗΣΤΙΣΙΜΟ  ΧΩΡΙΣ ΓΛΟΥΤΕΝΗ ΜΕ ΦΥΣΤΙΚΙ

Μερίδες: 8–10           Χρόνος ψησίματος: 45 λεπτά      Βαθμός δυσκολίας: εύκολο

Εύκολο, πεντανόστιμο και νηστίσιμο ραβανί χωρίς γλουτένη με φυστίκι Αιγίνης!

ravani2

ΥΛΙΚΑ:

Για το ραβανί

  • 130 γραμμ. φυστίκι Αιγίνης, σε μορφή πούδρας
  • 70 γραμμ. πολέντα καλαμποκιού χωρίς γλουτένη
  • 100 γραμμ. αμυγδαλόψιχα
  • 96 γραμμ. αλεύρι χωρίς γλουτένη για όλες τις χρήσεις
  • 100 γραμμ. κρυσταλλική ζάχαρη
  • 300 ml χυμό πορτοκαλιού
  • 125 ml (περίπου) κούπα ελαιόλαδο
  • 2 κ.σ. ξύσμα πορτοκαλιού
  • 2 κ.γλ. μπέικιν πάουντερ
  • 1/2 κ.γλ. σόδα φαγητού
  • 1 κουταλάκι του γλυκού εκχύλισμα βανίλιας
  • 4 κ.σ.ρούμι
  • 1/4 κουταλάκι του γλυκού αλάτι

Για το σιρόπι:

  • 700 ml (ή 3 κούπες) νερό
  • 650 γραμμ. (ή 3 κούπες) κρυσταλλική  ζάχαρη
  • 1 ξυλάκι κανέλας
  • 1/2 κούπα χυμό πορτοκαλιού

ΕΚΤΕΛΕΣΗ:

  1. Προθερμαίνουμε το φούρνο στους 190 βαθμούς Κελσίου.
  2. Αλείφουμε τη φόρμα του κέικ με τρύπα στη μέση, με ελαιόλαδο ή ηλιέλαιο και πασπαλίζουμε με λίγο αλέυρι.
  3. Σε ένα μεσαίο μπωλ προσθέτουμε τα στερεά υλικά:  το αλεύρι, την πολέντα, την αμυγδαλόψιχα, το τριμμένο φυστίκι αιγίνης, το μπέικιν πάουντερ και το αλάτι.
  4. Σε άλλο μεγάλο μπολ, βάζουμε τα υγρά υλικά: το χυμό πορτοκαλιού, το ελαιόλαδο, το ρούμι, το εκχύλισμα βανίλιας, ξύσμα πορτοκαλιού και τη ζάχαρη και τα χτυπάμε με το μίξερ χειρός μέχρι να λιώσει η ζάχαρη και να έχουμε ένα ομοιογενές μίγμα.
  5. Με το μίξερ στην πιο χαμηλή ταχύτητα, προσθέτουμε το μείγμα των στερεών υλικών στο μίγμα των υγρών.Αδειάζουμε το μίγμα στο ταψί και το ψήνουμε για 30-40 λεπτά.
  6. Όσο ψήνεται το γλυκό ετοιμάζουμε το σιρόπι:
  7. Σε μια κατσαρόλα βάζουμε το νερό, τη ζάχαρη, το ξυλάκι κανέλας και το χυμό πορτοκαλιού και τα βράζουμε για 8 λεπτά.
  8. Βγάζουμε το γλυκό από το φούρνο και το περιχύνουμε με το μισό ζεστό σιρόπι.
  9. Το ξαναβάζουμε στο φούρνο για 5 λεπτά.
  10. Το βγάζουμε από το φούρνο, το αφήνουμε να κρυώσει λίγο, το τρυπάμε με ξυλάκι για σουβλάκι  και το περιχύνουμε με το υπόλοιπο σιρόπι, αφήνοντάς το μέχρι να το απορροφήσει όλο.
 ravani piece

Sweet potato caramel pecan muffins


Sunday morning, Anna and I woke up with the desire to bake! All we needed was something not overly sweet, something we can pair with our glass of milk and be able to eat more than one without having a feeling our teeth might fell off from sugar1 Does this ever happened to you or is it just us?

And so it began…We searched our pantry and fridge and found treasures! Sweet potatoes and pecans, nut butter and the good things to keep your soul warm and toasty inside! These muffins are gluten-free and vegan but do not be deceived by the tag “vegan”. The taste is outstanding, you could never guess there are no eggs and dairy.

Indulge in these fluffy gluten-free and vegan sweet potato caramel pecan muffins, drizzled with luscious nutty caramel sauce. The natural sweetness of the potatoes, the nutty pecans, and the spices blend beautifully together in perfect harmony.

sweet muffin bite


sweet muffins


Sweet potato caramel pecan muffins

Makes: 12-14 muffins             Cooking time: 25 minutes           Difficulty: easy

INGREDIENTS:

• 1 cup gluten-free all-purpose flour
• 2 1/2 teaspoons baking powder
• 1 teaspoon cinnamon
• 1/2 teaspoon ground cloves
• 1/2  teaspoon ground ginger
• 1/4 teaspoon salt, or to taste
• 3/4 cup mashed sweet potatoes
• 1 teaspoon orange zest
• 1/2 cup granulated sugar
• 1/4 cup light brown sugar, packed
• 1/3 cup coconut oil
• 1/2 cup unsweetened nut milk
• 2 tablespoons mild molasses
• 2 teaspoons vanilla extract
• 1/3 cup pecans, chopped
• 1/4 cup demerara sugar

For the caramel sauce:

• 1/2 cup agave syrup
• 2 tbsp natural creamy almond butter
• 3/8 cup coconut cream
• 1/4 tsp salt

INSTRUCTIONS:

To make the caramel sauce:

1) In a small saucepan, heat on medium to high heat agave nectar for 3-4 minutes.
2) Add the almond butter and stir well. Cook for 1 minute, stirring all the time. (Be careful to not burn yourself!)
3) Add the coconut cream and stir well until the mixture becomes homogeneous. Leave on the heat for 30 seconds, then remove from heat, add salt and allow to cool.


For the muffins:

1) Preheat oven to 375 F. Grease a regular muffin pan very well and flour the pan; set aside.
2) In a large bowl add the flour, baking powder, cinnamon, cloves, ginger, chopped pecans, salt, and whisk together; set aside.
3) In a separate large bowl add the mashed sweet potatoes, sugars, oil, milk, molasses, orange zest, vanilla, and whisk until combined.
4) Pour the wet sweet potato mixture over the dry ingredients, and stir until just combined; don’t overmix.
5) Fill up 3/4-full of each muffin well; don’t overfill. Sprinkle with some demerara sugar.
6) Bake for about 17 to 18 minutes or until tops are set and a toothpick inserted in the center comes out clean or with a few moist crumbs, but no batter. Allow muffins to cool in pans for about 15 minutes before removing and placing on a wire rack to cool completely.
7) Drizzle with some almond butter caramel and enjoy!


Μάφινς γλυκοπατάτας με καραμέλα και πεκαν

Μερίδες: 12-14 muffins        Χρόνος ψησίματος: 25 λεπτά           βαθμός δυσκολίας: εύκολο

Αφράτα, αρωματικά μάφινς με γλυκοπατάτα, πεκάν και καραμέλα. Τα πιο νόστιμα μάφινς!

caramel sweet potato muffins


ΥΛΙΚΑ:

• 1 κούπα αλεύρι χωρίς γλουτένη για όλες τις χρήσεις
• 2 1/2 κουταλάκια του γλυκού baking powder
• 1 κουταλάκι του γλυκού κανέλα σε σκόνη
• 1/2 κουταλάκι του γλυκού γαρύφαλλο τριμμένο
• 1/2  κουταλάκι του γλυκού τριμμένο τζίντζερ
• 1/4 κουταλάκι του γλυκού αλάτι
• 3/4 κούπας λιωμένη γλυκοπατάτα
• 1 κουταλάκι του γλυκού ξύσμα πορτοκαλιού
• 1/2 κούπα κρυσταλλική ζάχαρη
• 1/4 κούπα καστανή ζάχαρη
• 1/3 κούπα λάδι καρύδας
• 1/2 κούπα άγλυκο γάλα αμυγδάλου ή κάσιους
• 2 κουταλάκι του γλυκού εκχύλισμα βανίλιας
• 1/3 κούπας πεκάν, ψιλοκομμένα
• 1/4 κούπας ζάχαρη δεμεράρα (προεραιτικό, αλλά κάνει τα μάφιν τραγανά)

Για τη σαλτσα καραμέλας:

• 1/2 κούπας σιρόπι αγαύης ή σφένδαμου
• 2 κουταλιές της σούπας κρεμώδες αμυγδαλοβούτυρο ή φυστικοβούτυρο
• 3/8 κούπας κρέμα καρύδας
• 1/4 κουταλάκι του γλυκού αλάτι

ΕΚΤΕΛΕΣΗ:

Για να φτιάξουμε την καραμέλα:

  1. Σε μία μικρή κατσαρόλα, σε μέτρια προς υψηλή θερμοκρασία ζεσταίνουμε το σιρόπι αγαύης για 3-4 λεπτά.
  2. Προσθέτουμε το αμυγδαλοβούτυρο και ανακατεύουμε καλά. Ανακατεύουμε καλά και τα αφήνουμε να ψηθεί για 1 περίπου λεπτό. (Προσοχή μην καείτε!)
  3. Προσθέτουμε την κρέμα καρύδας και ανακατεύουμε  μέχρι να ομογενοποιηθεί το μείγμα. Το αφήνουμε για 30 δευτερόλεπτα,αποσύρουμε από τη φωτιά, προσθέτουμε το αλάτι και την αφήνουμε να κρυώσει.

Για τα μάφινς:

1) Προσθέτουμε το φούρνο στουε 180 βαθμούς. Βουτυρώνουμε και αλευρώνουμε θήκες για μάφιν, το αφήνουμε στην άκρη.
2) Σε ένα μεγάλο μπωλ προεσθτουμε το αλεύρι, μπέικιν πάουντερ,κανένα,γαρύφαλλο,τζίντζερ,πεκάν, αλάτι και ανακατεύουμε καλά, αφήνουμε στην άκρη.
3) Σε ένα άλλο μεγάλο μπωλ προσθέτουμε τη λιωμένη γλυκοπατάτα,τις ζάχαρες,το λάδι,το γάλα, τη μελάσα,το ξύσμα πορτοκαλιού,τη βανίλια και ανακατεύουμε καλά.
4) Προσθέτουμε το μείγμα της γλυκοπατάτας στο μείγμα των ξηρών υλικών και ανακατεύουμε καλά μέχρι να ομογενοποιηθεί, μην ανακατεύψετε περισσότερο,διότι σφίξξει η ζύμη.
5) Γεμίστε τα 3/4 της κάθε θήκης για μάφιν, μη τα παραγεμίσετε. Πασπαλίστε με λίγη δεμεράρα ζάχαρη
6) Ψήνουμε για  17 με 18 λεπτά ή μέχρι το πάνω μέρος να είναι σληρό και κάνοντας το τεστ της οδοντογλυφίδας. Αφήνουμε τα μάφινς να κρυώσουν στις θήκες για 15 λεπτά πριν τα βγάλουμε τελείως από τις θήκες για α κρυώσουν εντελώς.
7) Περιχύστε λίγο από την καραμέλα και απολαύστε!


Sweet potato herbed biscuits


sweet potato biscuits

 Yesterday, one of my recipes were published on the website of VegNews, a  popular food magazine well-known to the vegan community. These soft and flaky sweet potato biscuits are packed with plenty of autumnal flavors. Perfect for your Thanksgiving dinner.

For the recipe visit VegNews http://vegnews.com/articles/page.do?pageId=10382&catId=2 

  I hope you’ll enjoy them as much as we did!


Hazelnut praline paste

It’s creamy, luscious, sweet with a nutty side… Without further ado, let me introduce you to my homemade hazelnut praline paste. Traditionally, praline is caramelized nuts- usually hazelnuts and almonds-pulverized and turned into a paste.

I won’t lie, it’s my first attempt and it was successful! It’s so easy to make, with only a few ingredients. I prefer buying hazelnuts raw and roasting them myself. I love it when roasted hazelnuts release their aromas! The key is to do not burn the caramel. When burned, caramel has that nasty bitter flavor, that I’m pretty much sure nobody likes.

If you want your praline paste to be successful, the key is to be patient with caramel, do not stir it and do not burn it! When burned, caramel has that nasty bitter flavor, that I’m pretty much sure nobody likes.


caramelized hazelnuts

hazelnuts

pan hazelnut praline


Hazelnut praline paste

Servings: 8              Cooking time: 30 minutes             Difficulty: easy

INGREDIENTS:

  • 3 cups raw hazelnuts
  • 1 1/2 cups granulated sugar
  • 3 tablespoons water
  • teaspoons vegetable oil
INSTRUCTIONS:
  1. Preheat oven to 375 degrees F.

  2. Place hazelnuts in a sheet pan

  3. Bake for 15-20 minutes or until hazelnuts becomes aromatic and skin begins to break.

  4. Remove from oven and place the hazelnuts on a clean kitchen towel. Rub the hazelnuts together to remove the skin from them. Set aside.

  5. Place sugar and water in a pan over medium-low heat. Do not stir. When sugar starts turning an amber color and turns into caramel, add the hazelnuts and whirl the pan around so hazelnuts get coated in the caramel. DO NOT OVERCOOK CARAMEL!

  6. Place this mixture on a Silpat or a parchment lined sheet pan. Spread it with a spoon until hazelnuts are all in a single layer and cool down for 2-3 hours.

  7. When mixture hardens and cools, break it into little pieces.

  8. Place pieces in a food processor or blender. Process until the mixture turns into a paste. If the mixture does not come together, add the vegetable oil.

  9. Pour this mixture into a jar. If can be used right away, frozen or refrigerated.


     Σπιτική πραλίνα φουντουκιού

praline4

Στη ζαχαροπλαστική με τη λέξη πραλίνα αναφερόμαστε στους καραμελωμένους ξηρούς καρπούς –συνήθως φουντούκια ή αμύγδαλα– που αλέθονται έπειτα στο μπλέντερ για να γίνουν κρέμα.

Μερίδες: 8             Χρόνος ψησίματος: 30 λεπτά          Βαθμός δυσκολίας: εύκολο

ΥΛΙΚΑ:

  • 3 κούπες ωμά φουντούκια
  • 1 1/2 κούπες κρυσταλλική ζάχαρη
  • 3 κουταλιές της σούπας νερό
  • 2 κουταλάκια του γλυκού ηλιέλαιο ή καλαμποκέλαιο

ΕΚΤΕΛΕΣΗ:

  1. Προθερμαίνουμε τον φούρνο στους 180 βαθμούς.Preheat oven to 375 degrees F.

  2. Βάζουμε τα φουντούκια σε ένα ταψί και ψήνουμε για 15-20 λεπτά ή μέχρι τα φουντούκια βγάλουν τα αρώματα τους και η φλούδα αρχίζει να σπάει.
  3. Τα βγάζουμε από το φούρνο και τα τοποθετούμε σε μια καθαρή πετσέτα κουζίνας, τρίβουμε τα φουντούκια μεταξύ τους και αφαιρούμε τη φλούδα. Τα αφήνουμε στην άκρη.
  4. Σε ένα αντικολλητικό τηγάνι, σε χαμηλή προς μέτρια θερμοκρασία, βάζουμε τη ζάχαρη με το νερό. Δεν ανακατεύουμε. όταν η ζάχαρη αρχίζει να παίρνει χρυσο προς καραμελένιο χρώμα, προσθέτουμε τα φουντούκια και κουνάμε το τηγάνι έτσι ώστε να καλυφθούν τα φουντούκια με την καραμέλα. ΠΡΟΣΟΧΗ ΜΗΝ ΚΑΕΙ Η ΚΑΡΑΜΕΛΑ!
  5. Τοποθετούμε το μείγμα σε αντικολλητικό χαρτί και με ένα κουτάλι το απλώνουμε παντού και το αφήνουμε να κρυώσει για  2-3 ώρες.
  6. Όταν το μείγμα σκληρύνει και κρυώσει, σπάστε το σε μικρά όσο γίνεται κομμάτια.
  7. Βάλτε τα στο μπλέντερ ή  food processor. Αρχίστε να πολτοποιείτε το μείγμα,αν δείτε πως δν δένει, προσθέστουμε το λάδι σιγά σιγά.
  8. Βάλτε το σε αποστειρωμένα βαζάκια και η πραλίνα σας είναι έτοιμη.

Gluten free nutella hazelnut twists

There are times, I think about sweets (mostly desserts) pretty much every day. Sometimes, there is an idea stuck in my head and I’m trying to execute it, most of the times successfully. My biggest challenge as a celiac patient is to replicate or mimic puff pastry. I’m pretty close, though! I think many of you can relate.I’ve seen them so many of them on Pinterest, yet I’ve never made them, not because I didn’t, but I couldn’t.

This time, I wanted to make Nutella twists. Many people use puff pastry, smothered with Nutella and sprinkled with hazelnuts. Can you only imagine how delicious that might be? I’ve seen them on Pinterest, yet I’ve never made them. Until now! I substitute puff pastry for my cinnamon roll dough and the results were stunning!

Soft gluten-free twists filled with chocolate hazelnut spread and sprinkled some toasted hazelnuts.  It’s impossible to eat only one!

nutella twists3

nutella twists2


Gluten-free chocolate hazelnut twists

Makes: 8                Baking time: 15-20 minutes               Difficulty: easy

INGREDIENTS:

  • 1 batch cinnamon roll dough
  • 1/2 cup hazelnut spread
  •  1/2 cup finely chopped hazelnuts

DIRECTIONS:

  1. Prepare dough according to instructions. After beating the dough put the dough in the fridge for 20 to 30 minutes so it can harden a little bit.
  2. Preheat oven to 375 F. Line a cookie sheet with parchment paper and set aside.
  3. On a floured surface roll the dough into a 13×7 inch rectangle. Spread hazelnut spread evenly over half of dough to within 1/4 inch of sides; sprinkle with hazelnuts.
  4. Fold over the dough and press firmly to seal the edges. Cut into 8 (13-inch) strips. Twist each strip and place it on the baking sheet.
  5. Bake 15-20 minutes or until golden brown. Immediately remove from sheet to cooling rack. Cool 5 minutes.

Twists με κρεμα πραλινα σοκολάτα.

Βγαίνουν: 8           Χρόνος ψησίματος: 15–20 λεπτά      Βαθμός δυσκολίας: εύκολο

Εύκολα ζυμαρένια γλυκά με πραλίνα σοκολάτας και φουντούκια. Μόνο ένα δεν αρκεί!

nutella twists

ΥΛΙΚΑ:

  • 1 ζύμη για ρολά κανέλας
  • 1/2 κούπα αλειμμα πραλίνα σοκολάτας
  •  1/2 κούπα ψιλοκομμένα φουντούκια

ΟΔΗΓΙΕΣ:

  1. Προετοιμάστε τη ζύμη σύμφωνα με τις οδηγίες. Αφότου χτυπήσουμε τη ζύμη,  καλύπτουμε το μπωλ με μεμβράνη και τη βάζουμε στο ψυγείο για 20 με 30 λεπτά για να σκληρύνει λίγο περισσότερο. Με αυτό τον τρόπο πλάθεται πιο εύκολα. Αν η ζύμη σας είναι ελαστική, δε χρειάζεται ψύξη.
  2. Προθερμαίνουμε το φούρνο στους 180 βαθμούς. Στρώνουμε ένα μακρόστενο ταψί με αντικολλητικό χαρτί και το αφήνουμε στην άκρη.
  3. Σε μία ελαφρώς αλευρωμένη επιφάνεια, ανοίγουμε τη ζύμη σε ένα ορθογώνιο 33×17 εκ. Στη μισή ζύμη αλείφουμε την πραλίνα σοκολάτας, πασπαλίζουμε τα φουντούκια αφήνοντας περιθώριο στις άκρες περίπου μισό εκατοστό.
  4. Διπλώνουμε τη ζύμη και πατάμε ελαφρώς τις άκρες. Κόβουμε σε 8 λωρίδες. Στρίβουμε την κάθε λωρίδα και την τοποθετούμε στο ταψί.
  5. Ψήνουμε για 15-20 λεπτά ή μέχρι να πάρουν ένα χρυσό χρώμα. Τα αφήνουμε να κρυώσουν ελαφρώς.

Gluten-free chocolate filled pumpkin donuts

The recipe I’m sharing with you today is an example of what happens to a failed recipe. Before you make any assumptions and rush to conclusions let me tell you that the final result was outstanding!

I have a big love to doughs, whether is pasta dough, bread dough or simply sweet dough, I just adore them! There are like a canvas, a vessel where you can add whatever you wish for.

As I was in the process of executing mini loaf brioche recipe, a recipe I made so many times before, it seemed that day it wasn’t quite my day. The recipe calls for 40 minutes of rest before baking, but I was in a rush and let it only 25 minutes. The loaves were not puffy and risen as they should be. Dumping such a beautiful dough, was not an option so I turned them into beautiful donuts!

Fluffy and pumpkin spiced brioche donuts filled with smooth chocolate and Barney Butter vanilla+espresso almond butter.  The vanilla+espresso almond butter flavor was the best choice. I love the visible espresso powder added in the almond butter, it’s calling you pair it with chocolate! These fellas will make you beg for more!

ντονατς κολοκυθας2

ντονατς κολοκυθας


sugar pumpkin donut

ντονατς κολοκυθας4


Gluten-free chocolate filled brioche donuts

Makes: 10-12 donuts              Cooking time: 10-15 minutes     Difficulty: medium

Adapted from Cup4cup

INGREDIENTS:

FOR THE ROLLS:

  • 2 teaspoons (7 g) active dry yeast
  • 1 tablespoon + 2 teaspoons (20 g) granulated sugar
  • 3/4 cup + 2 tablespoons + 1 3/4 teaspoons (230 g) warm water
  • 3 3/4 cup + 1 tablespoon (535 g) Cup4Cup flour
  • 1 teaspoon kosher salt
  • 3.5 ounces (100 g) unsalted butter, melted and cooled
  • 1/4 cup (80 g) honey
  • 2 large eggs + 1 yolk, room temperature
  • 1/4 cup pumpkin puree
  • 1 teaspoon orange zest
  • 1/4 teaspoon ground cinnamon
  • 1/4 teaspoon ground nutmeg
  • 1/4 teaspoon fresh ginger, grated

FOR THE FILLING:

  • 1/2 cup semi-sweet chocolate chips
  • 1/3 cup Barney Butter vanilla+espresso almond butter

INSTRUCTIONS:

  1. In a small bowl, combine the yeast with the sugar and warm water to activate the yeast. Allow it to sit in a warm area until the yeast mixture is foaming and bubbly, about 5-10 minutes.
  2. Combine the flour, spices, and salt in the bowl of a stand mixer fitted with a paddle attachment.
  3. In a separate bowl, whisk together the melted butter, honey, eggs, pumpkin puree and the yeast mixture.
  4. With the stand mixer on low speed, slowly pour the egg mixture into the flour mixture. Increase the speed to medium to fully incorporate the egg mixture into the flour mixture. Continue to mix the dough for another 5 minutes on medium speed. The dough should be silky and not stiff like regular bread dough.
  5. Remove the bowl from the stand mixer. Cover the bowl tightly with plastic wrap. Place the bowl in a warm area and let the dough rise until it roughly doubles in size, about 1 hour.
  6. Unwrap the bowl, punch down the dough, and wrap again tightly with plastic wrap. Place the bowl in the refrigerator for at least 2 hours. (Note: when punching the dough, you may lightly flour your hands to prevent sticking.)
  7. While dough rest in the fridge, make the chocolate filling. Combine chocolate and almond butter, and melt until smooth. Place chocolate filling in the fridge.
  8. Remove the dough from the refrigerator. In a well-floured silpat, knead the dough as gentle as possible. I always use a silicone spatula.
  9. Roll the dough out until it is 1/2 inch thick.
    Cut out a 2 1/2 inch round using a biscuit or cookie cutter. Alternatively, you could use a glass that is roughly 2 1/2 inches and trace it with a knife to cut out the round.
  10. Place a teaspoon of the chocolate-almond butter truffle in the center of each round & wrap the dough around it. Pinch the seams to seal the chocolate in the center.
  11. Place the donuts on a parchment paper-lined baking sheet & loosely cover them with a damp paper towel.
  12. Allow the donuts to rise for 25 minutes.
    Heat 2 to 3-inches of oil in a heavy, high-sided pot over medium heat until the oil reaches 350 degrees F.
  13. Working in batches of 3, drop the doughnuts into the oil & fry until they float.
    Turn the doughnuts over in the oil & continue cooking. Cook the doughnuts, until they are uniformly golden. Transfer fried donuts to a plate lined with paper towels to drain.
  14. While the donut is still warm, roll it in the cinnamon Sugar (about a 30 seconds-1 minute after placing on a paper towel) until it is evenly coated.

Enjoy!


Ντονατς κολοκύθας γεμιστά με σοκολάτα

Αφράτα νόστιμα ντόνατς κολοκύθας, γεμιστά με σοκολάτα. Ο συνδυασμός γλυκιάς κολοκύθας με την διακριτική γεύση πορτοκαλιού και μπαχαρικών, φαίρνουν τα ντόνατς σε άλλο επίπεδο!

Βγαίνουν: 10-12 ντόνατς             Χρόνος μαγειρέματος: 10-15 minutes     Βαθμός δυσκολίας: μέτριος

ντονατς κολοκυθας4


ΥΛΙΚΑ:

ΓΙΑ ΤΑ ΝΤΟΝΑΤΣ

  • 2 κουταλάκια της σούπας (7 g) ξηρή μαγιά
  • 1 κουταλιά της σούπας + 2 κουταλάκια του γλυκού (20 g) granulated sugar
  • 3/4 κούπας + 2 κουταλιές της σούπας + 1 3/4 κουταλάκια του γλυκού (230 g) χλιαρό νερό
  • 3 3/4 κούπες + 1 κουταλιά της σούπας (535 g) αλεύρι για τσουρέκι (ισως χρειαστεί λιγότερο)
  • 1 κουταλάκι του γλυκού αλάτι
  • 100 γραμμάρια ανάλατο βούτυρο, λιωμένο και το αφήνουμε να κρυώσει
  • 1/4 κούπας (80 g) μέλι
  • 2 μεγάλα αυγά + 1 κρόκος, θερμοκρασία δωματίου
  • 1/4 κούπας πουρέ κολοκύθας (χωρίς αλάτι!)
  • 1 κουταλάκι του γλυκού ξύσμα πορτοκαλιού
  • 1/4 κουταλάκι του γλυκού κανέλα σε σκόνη
  • 1/4 κουταλάκι του γλυκού τριμμένο μοσχοκάρυδο
  • 1/4 κουταλάκι του γλυκού φρέσκο τζίντζερ, τριμμένο

ΓΙΑ ΤΗ ΓΕΜΙΣΗ:

  • 1/2 κούπα ημίγλυκα τσιπς σοκολάτας
  • 1/3 κούπας αμυγδαλοβούτυρο ή φυστικοβούτυρο


ΕΚΤΕΛΕΣΗ:

  1. Σε ένα μικρό μπωλ, συνδυάστε τη μαγιά με τη ζάχαρη και το χλιαρό νερό για να ενργοποιηθεί η μαγιά. Αφήστε τη να φουσκωσει για 5-10 περίπου λεπτά.
  2. Συνδυάστε το αλεύρι, τα μπαχαρικά και το αλάτι, στον κάδο του μίξερ με το φτερό.
  3. Σε άλλο μπωλ, ανακατεύουμε το λιωμένο βούτυρο, μέλι,αυγά, πουρέ κολοκύθας και το μείγμα μαγιάς.
  4. Ξεκινώντας το μίξερ στην χαμηλή ταχύτητα, προσθέτουμε σιγά σιγά το υγρό μείγμα. Αθξάνουμε την ταχύτητα στο μέτριο και το χτυπάμε για 5 λεπτά. Η ζύμη θα είναι απαλή και ελαστική, όχι σφιχτή, όπως η ζύμη ψωμιού.
  5. Σκεπάζουμε τον κάδο με τη ζύμη με πλαστική μεμβράνη και την αφήνουμε να φουσκώσει σε ζεστό μέρος για 1 ώρα.
  6. Μόλις περάσει 1 ώρα, αφιαρούμε την μεμβράνη, αλευρώνουμε ελαφρώς τη γροθιά μας και ξεφουσκώνουμε τη ζύμη. Σκεπάζουμε πάλι με τη μεβράνη και τη βάζουμε στο ψυγείο για 2 ώρες.
  7. όσο η ζύμη βρίσκεται στο ψυγείο, φτιάχνουμε τη γέμιση. Λιώνουμε τη σοκολάτα μαζί με το βούτυρο αμυγδάλου ή φυστικοβούτυρο. Τοποθετείστε το μείγμα στο ψυγείο μεχρι να σφίξει.
  8. Βγάλτε τη ζύμη και τη γέμιση από το ψυγείο. Σε μία καλά αλευρωμένη επιφάνεια, ζυμώνουμε ελαφρώς. *
  9. Ανοίγουμε τη ζύμη μας  ενάμιση εκατοστό περίπου σε πάχος.
    Με ένα κουπάτ 6 περίπου εκατοστών ή ένα ποτήρι, ῾῾κόβουμε᾽᾽τα ντόνατς.
  10. Παίρνουμε το κάθε ντονατς και στη μέση προσθέτουμε 1 κουταλάκι του γλυκού από τη γέμιση. Το κλεινουμε προσεκτικά τσιμπώντας τις άκρες.
  11. Τοποθετείστε τα ντόνατς σε ένα ταψί στρωμένο με αντικολλητικό χαρτί και σκεπαστε το ελαφρά με μία πετσέτα.
  12. Αφήστε τα να φουσκώσουν για 25 λεπτά. Σε ένα βαθύ τηγάνι, ζεσταίνουμε λάδι (το λάδι πρέπει να είναι 5 με 7 εκατοστά σε ύψος) για τηγάνισμα (όχι ελαιόλαδο!!) μέχρι η θερμοκρασία να φτάσει τους 180 βαθμούς.
  13. Τηγανίζουμε τα ντονατς ανα 3. Είναι έτοιμα, μόλις αρχίσουν και επιπλέουν, τότε τα γυρνάμε και τα τηγανίζουμε από την άλλη μέχρι να πάρουν ένα χρυσό προς ελαφρό καφετί χρώμα.
    Μόλις ειναι ετοιμα τα τοποθετούμε σε ένα πιάτο με χαρτί κουζίνας.
  14. Όσο τα ντόνατς είναι ακόμα ζεστα, τα πασπαλίζουμε με ζάχαρη και κανέλα (περίπου 30 δευτερόλεπτα με 1 λεπτό αφού τα έχουμε στραγγίξει στο χαρτί κουζίνας).

*Αν η ζύμη σας είναι σφιχτή, δε χρειάζεται περισσότερο αλεύρι, μπορείτε να λαδώσετε ελαφρά την επιφάνεια. 

ντονατς κολοκυθας3


Almond Joy​ style candy bars


Last week, we went shopping at the grocery store with my daughter, and I caught her starring the coconuts. We were both very curious about what’s inside the coconuts, so we bought one with the hope everything will turn out fine.

We watched a very informative video on Youtube, about how to crack open a coconut. Anna was just watching from afar and I was trying to crack it open. It worked! We drunk the sweet and delicious coconut water and that’s when it hit me!

pan coconuts

How about making some delicious and easy almond joy candy bars? I had all the ingredients I needed and we got to work. It took less than 5 minutes to mix all the ingredients together and form the little oblong balls. If Anna, a 5-year old can do it, so can you!

For the coating, we used the best and purest ingredients possible. We used Barney Butter almond butter with cocoa and coconut, a smooth delicate flavor combination that takes the candy to a whole level!

almond joy

almond joyz

Easy to make, delicious, vegan, no-bake almond joy style candy bars. No fuss, no mess (if you don’t have a 5-year-old messing with the rest of the coating!)


Almond joy style candy bars

Yields: 12                Cooking time: 1-minute       Difficulty: easy

INGREDIENTS:

  • 2 1/2 cups shredded unsweetened coconut
  • 1 tsp vanilla extract
  • 3 -4 tablespoons agave syrup (depending on desired sweetness)
  • 4 T unrefined coconut oil, melted
  • 2 tablespoons coconut cream

For the Coating

INSTRUCTIONS:

  1. In a food processor, combine coconut, coconut oil, agave nectar, and vanilla and pulse for about 30-45 seconds.
  2. Form small oblong balls with the mixture and place on a big plate lined with parchment paper.
  3. Refrigerate for about 15 minutes to set.
    In a small bowl, melt chocolate chips, almond butter and vanilla extract and salt until smooth.
  4. Once coconut pieces have set, dip and coat with chocolate, press one almond into the top of each piece drizzle with some extra melted chocolate to coat the almond and place back on parchment paper.
  5. Refrigerate for about 30 minutes and then you are ready to enjoy!

Σοκολατένιες μπάρες καρύδας (Bounty)

Φτιάξαμε τις αγαπημένες μας μπάρες σοκολάτας με καρύδα και είναι πιο νόστιμες από ποτέ! Εύκολες, πεντανόστιμες, με βίγκαν ή κανονική επιλογή.

almond joy2

Βγαίνουν: 12              Χρόνος μαγειρέματος : 4– 5 λεπτά      Βαθμός δυσκολίας: εύκολο

ΥΛΙΚΑ:

  • 2 1/2 κούπες τριμμένη καρύδα, άγλυκη
  • 1 κουταλάκι του γλυκού εκχύλισμα βανίλιας
  • 3 -4 κουταλιές της σούπες σιρόπι αγάυης ή μέλι( εξαρτάται από το πόσο γλυκό το θέλετε)
  • 4 κουταλιές της σούπας λάδι καρύδας, λιωμένο
  • 2 κουταλιές της σούπας κρέμα καρύδας

Για την επικάλυψη

  • 1 1/2 κούπας ημίγλυκα τσίπς σοκολάτας (βίγκαν ή κανονικά)
  • 1/4 κούπας αμυγδαλοβούτυρο ή φυστικοβούτυρο (προεραιτικό)
  • 1 κουταλάκι του γλυκού εκχύλισμα βανίλιας
  • μικρή πρέζα αλάτι
  • ωμά αμύγδαλα για κάθε σοκολατάκι

ΕΚΤΕΛΕΣΗ:

  1. Σε ένα μεγάλο πολυκόφτη (food processor), συνδυάστε την τριμμένα καρύδα, το λάδι καρύδας, το σιρόπι αγαύης και το εκχύλισμα βανίλιας, και χτυπάμε για περιπου 30-45 δευτερόλεπτα.
  2. Πλάστε μικρές μακρόστενες μπάλες με το μείγμα κι τοποθετείστε τα σε ένα μεγάλο πιάτο στρωμένο με αντικολλητικό χαρτί.
  3. Βάλτε τα στο ψυγείο για  15 λεπτά μέχρι να σφίξουν.
    Σε ένα μικρό μπωλ, λιώνουμε τη σοκολάτα, το αμυγδαλοβούτυρο ή φυστικοβούτυρο (αν θέλετε), το εκχύλισμα βανίλιας και την πρέζα αλάτι, μέχρι να ομογενοποιηθεί.
  4. Όταν εχουν σφιξει οι μακρόστενες μπάλες καρύδας, με ένα πηρούνι, τις βουτάμε μία μία στο μείγμα για την επικάλυψη, τοποθετούμε ένα αμύγδαλο στο κέντρο και περιχύνουμε με λίγη σοκολάτα μέχρι να καλυφθεί το αμύγδαλο και το τοποθετούμε ξανά στο πιάτο με το αντικολλητικό χαρτί.
  5. Βάλτε τα στο ψυγείο για 30 λεπτά περίπου μέχρι να σφίξει.

almond joys


Gluten-free pumpkin chocolate pancakes

After our healthy banana pancakes, Anna has been asking me, when am I going to make pancakes again. But not any kind of pancakes, chocolate pancakes with chocolate sauce on top. Well, I couldn’t break my little one’s heart… Who am I kidding? I loved the idea of chocolate on top of chocolate!

I substitute egg with pumpkin puree,  added cocoa powder and some agave nectar for some sweetness. The results? Incredibly delicious! Fluffy and thick chocolate pancakes, with the citrucy kick, topped with chocolate ganache! The best thing is, both pancakes and chocolate ganache are vegan, yet scrumptious!

Of course, I let Anna do her own thing and transform a beautiful stack of pancakes into a cake, as she called it.

messy choco pancakes

choco pancakez

chocolate pancakez


Gluten-free pumpkin chocolate pancakes

Makes: 10-12  Cooking time: 15 minutes Difficulty: easy

INGREDIENTS:

  • 1 3/4 cup gluten-free all purpose flour
  • 1½ tbsp baking powder
  • ¼ tsp salt
  • 1.7 oz/50 gram. cocoa powder
  • ¾ -1 cup almond milk
  • 1/4 cup pumpkin puree
  • 1 teaspoon tangerine or orange zest
  • 2 tbsp agave nectar
  • 1 tsp vanilla extract

INSTRUCTIONS:

  1. In a large bowl, mix dry ingredients until well combined. Make a well in the center and stir in the wet ingredients (including pumpkin puree) and whisk until well combined.
  2. Heat a lightly oiled pan over medium-high heat.
  3. Pour approximately 1/4 cup of the batter for each pancake. Spread batter with a spoon to make a thinner style pancake. Cook until bubbles form, then flip and cook for another 1-2 minutes.

Top it with vegan chocolate ganache.


Μερίδες: 10–12 Χρόνος ψησίματος: 15 λεπτά Βαθμός δυσκολίας: εύκολο

Εύκολες, υγιεινές, νόστιμες και αφράτες Αμερικάνικες τηγανίτες χωρίς γλουτένη  σοκολάτας με πουρέ κολοκύθας. Κατάλληλο για μικρά και μεγάλα παιδιά!

chocolate pancakez

ΥΛΙΚΑ:

  • 1 3/4 κούπα αλεύρι χωρίς γλουτένη
  • 1½ κουταλιά της σούπας μπέικιν πάουντερ
  • ¼ κουταλάκι του γλυκού αλάτι
  • 50 γραμμ. σκόνη κακάο, χωρίς γλουτένη
  • ¾ -1 κούπα γάλα αμυγδάλου ή κανονικό
  • 1/4 κούπας πουρές κολοκύθας
  • 1 κουταλάκι του γλυκού ξύσμα μανταρινιού ή πορτοκαλιού
  • 2 κουταλιές της σούπας σιρόπι αγαύης ή μέλι
  • 1 κουταλάκι του γλυκού εκχύλισμα βανίλιας

ΟΔΗΓΙΕΣ:

  1. Σε ένα μεγάλο μπωλ, ανακατεύουμε τα ξηρά υλικά.Κάνουμε μια λακούβα στο κέντρο και προσθέτουμε τα υγρά υλικά (συμπεριλαμβανομένης και του πουρέ κολοκύθας) και ανακατεύουμε μέχρι να ομογενοποιηθεί το μείγμα.
  2. Ζεσταίνουμε ένα ελαφρώς βουτυρωμένο αντικολλητικό τηγάνι σε μέτρια προς υψηλή φωτιά.
  3. Ρίχνουμε περίπου 1/4 κούπας από το μείγμα μας στο τηγάνι. Με ένα κουτάλι απλώνουμε ελαφρά για πιο λεπτή τηγανίτα. Ψήνουμε μέχρι να σχηματιστούν φουσκάλες από τη μία μεριά, γυρίζουμε από την άλλη μεριά και συνεχίζουμε το ψήσιμο για ακόμη 1-2 λεπτά.
    Γαρνίρουμε με πεντανόστιμη και σπιτική Vegan σοκολάτα ganache

choco pancakez

messy choco pancakes


Gluten free Greek bagels

I come from a small town, 20 kilometers or 13 miles from Athens, where everyone knows everybody. Every once in a while my mother was dragging us to Athens, to run some errands, but my most favorite part was the time for a snack, which was either tyropita (cheese hand pies) or Greek bagels sold in small food carts by vendors.

You find them in every corner in the streets of big cities. The most common snack, a simple delicacy, and a beautiful childhood memory!

These Greek bagels are bigger than the American bagel, slightly crispier yet soft and tender on the inside. Perfect for breakfast or snack. So, as you can see, I couldn’t give them a try, I had to make a gluten-free version of them! When they’re baking the whole house smells amazing!


koulouria2

koulouria


Gluten-free Greek bagels


Yields: 10 bagels                      Baking time: 15-20 minutes      Difficulty: easy

Recipe adapted from Akis Petretzikis

INGREDIENTS:

  • 420 gr/18 oz gluten free all purpose flour
  • 7 ½ g/ 1 teaspoon salt
  • 40 gr/ 1.4 oz sugar
  • 50 ml/ approx. 1/4 cup olive oil
  • 200 ml/ 7 oz. water, at room temperature
  • 9 grams (2 teaspoons)  active dry yeast

For coating and water bath

  • sesame seeds
  • 2 tablespoons sugar
  • 500 ml/ 2cups lukewarm water

INSTRUCTIONS:

  1. Preheat the oven to 390 F (200 C ). Line baking sheets with parchment paper and set aside.
  2. In the mixing bowl of your mixer, add the water and yeast and mix with a spoon until the yeast has dissolved. Let it rest for 5-6 minutes until the yeast becomes foamy.
  3. Add the rest of the ingredients to the mixing bowl (the all-purpose flour, sugar, and salt). Beat them, using the paddle attachment, on medium/high. It should take about 7-8 minutes until it forms a soft, elastic dough, which is easy to handle. The dough will start to pull off the bottom.
  4. Grease the mixing bowl with oil. Transfer the dough to the bowl, cover with plastic wrap. Allow resting for 30 minutes to 1 ½ hours or until it doubles in size.
    Fill a bowl with water (500g). Add the sugar and mix until the sugar dissolves.  In a separate bowl add the sesame seeds.
  5. Brush some oil onto a clean work surface before setting down the dough. Cut into about 10 pieces.
    Form smooth balls. Knead each ball by hand, into a long log.  Bring the two edges together to form a circle. Try to make them all the same size and shape.
  6. Dip each bagel into the bowl with water and directly into the bowl with sesame seeds.
    Bake for about 15-20 minutes, until golden.

ΚΟΥΛΟΥΡΙΑ ΘΕΑΣΣΑΛΟΝΙΚΗΣ ΧΩΡΙΣ ΓΛΟΥΤΕΝΗ

Αφράτα σουσαμένια κουλούρια Θεσσαλονίκης χωρίς γλουτένη, τέλεια για πρωινό ή κολατσιό για τα παιδιά!

koulouria1


Μερίδες: 10                      Χρόνος ψησίματος: 15–20 λεπτά     Βαθμός δυσκολίας: εύκολο

ΥΛΙΚΑ:

  • 420 γρ. αλεύρι για όλες τις χρήσεις, χωρίς γλουτένη
  • 7 ½ γρ. αλάτι
  • 40 γρ. ζάχαρη
  • 50 γρ.  ⁄ 1 ⁄ 4 κούπας ελαιόλαδο
  • 200 γρ. νερό σε θερμοκρασία δωματίου
  • 2 φακελάκια ξερή μαγιά

Για την επικάλυψη

  • σουσάμι
  • 2 κ.σ. ζάχαρη
  • 500 γρ. χλιαρό νερό

ΕΚΤΕΛΕΣΗ:

  1. Προθερμαίνουμε τον φούρνο στους 200ο C. Στρώνουμε 2 μακρόστενα ταψιά με λαδόκολλα και αφήνουμε στην άκρη.
  2. Στο κάδο του μίξερ ρίχνουμε το νερό με τη μαγιά και ανακατεύουμε με ένα κουτάλι μέχρι να διαλυθεί η μαγιά. Αφήνουμε για 5-6 λεπτά να φουσκώσει η μαγιά.
  3. Προσθέτουμε στον κάδο όλα τα υπόλοιπα υλικά για τη ζύμη (το αλεύρι χωρίς γλουτένη, τη ζάχαρη και το αλάτι) και τα χτυπάμε με τοφτερό σε μέτρια προς δυνατή ταχύτητα για 7-8 λεπτά ταχύτητα μέχρι να γίνει μια μαλακή ζύμη, ελαστική και εύκολη στο δούλεμά της. Η ζύμη θα ξεκινάει να ξεκολλάει από τον πάτο.
  4. Λαδώνουμε τα τοιχώματα ενός μπολ και μεταφέρουμε τη ζύμη να ξεκουραστεί εκεί μέσα σκεπάζοντάς το με μία μεμβράνη για 30’- 1 ½ ώρα ή μέχρι να διπλασιαστεί ο όγκος της.Σε ένα άλλο  μπολ γεμίζουμε με το νερό (500γρ.) και τη ζάχαρη και ανακατεύουμε μέχρι να διαλυθεί η ζάχαρη. Σε ένα άλλο μπολ προσθέτουμε το σουσάμι.
  5. Λαδώνουμε τον πάγκο εργασίας μας, βάζουμε τη ζύμη και κόβουμε σε κομμάτια βάρους  (10 τεμάχια) .Σχηματίζουμε με τα κομμάτια ζύμης μπαλάκια. Το κάθε μπαλάκι το πλάθουμε με τα χέρια μας σαν λουκάνικο και ενώνουμε τις 2 άκρες για να σχηματίσουμε το κουλούρι μας. Προσέχουμε όλα τα κουλούρια να έχουνε την ίδια διάμετρο.
  6. Βουτάμε το κάθε κουλούρι μέσα στο νερό και αμέσως μετά στο μπολ με το σουσάμι.
    Τα ψήνουμε για 15-20 λεπτά περίπου μέχρι να πάρουν ωραίο χρώμα.


Gluten free apple pie crescents

About a month ago, I made cinnamon rolls. So fluffy and incredibly delicious! After devouring them, I realized how great it would be to make crescent rolls filled apple pie filling. I gathered all my ingredients, but there was something missing, something that would take my apple pie filling to a whole another level. That was creamy, smooth and bare Barney Butter almond butter.

I gathered all my ingredients, but there was something missing, something that would take my apple pie filling to a whole another level. That was creamy, smooth and bare Barney Butter almond butter. I chose the sugar-free version, because of the light brown sugar added in the filling. I started

I start making the filling and I might or might not “tried” it, more than I should, but I don’t regret it! Its smooth texture and caramel-like taste, blend so perfectly together with the spices and the fluffy sweet dough.


apple crescents


apple pie crescents


GLUTEN FREE APPLE PIE CRESCENTS

Makes: 10-12                Baking time: 15 minutes                           Difficulty: easy

INGREDIENTS:

For the filling:

  • 2 fuji apples (or any kind of apples), peeled and diced(or thinly sliced)
  • 1 tablespoon butter
  • 1/4 cup light brown sugar
  • 1/4 cup bare smooth Barney Butter almond butter
  • juice and zest  of an orange
  • 1/2 teaspoon cinnamon powder
  • 1/4 teaspoon fresh grated ginger
  • 1 teaspoon vanilla extract
  • 1/4 teaspoon nutmeg

For the topping:

  • 3 tablespoons melted butter
  • granulated sugar
  • cinnamon powder

INSTRUCTIONS:

  1. Prepare dough according to instructions.
  2. To make the filling: In a medium pot over medium heat, add butter let it melt and add diced apples, cinnamon, ginger, nutmeg and brown sugar. Stir until apples start softened a bit and caramelize.
  3. Lower heat, incorporate the almond butter, orange juice and zest, and vanilla extract. Stir until filling starts bubbling a little bit and starts thickening. It will take approximately 5 minutes. Let it cool down to room temperature.
  4. Preheat your oven to 375 F/ 180 C, line parchment paper in a sheet pan and set aside.
  5. To shape your crescents: My dough is really elastic, because of the flour I use (Cup4Cup).  If you’re in Europe, use gluten-free flour for dough or bread. Cover your work surface with a good quality plastic wrap and then a light layer of gluten-free flour.
    Place dough in the center and cover with a bit more gluten-free flour, if needed. Put another sheet of plastic wrap, roll out into a circle about 12 inches in diameter and then carefully peel off the top layer of plastic wrap. Cut into 12 equal triangles. Add a teaspoon or so on each wider end, roll up each dough triangle. Place on prepared baking sheet. Cover baking pan with a clean, dry towel and let the dough rise for 15 minutes. Brush each crescent with melted butter and sprinkle with some granulated sugar and cinnamon powder.
  6. Bake for 15-20 minutes, until golden brown. Drizzle some more of that “caramel” like sauce, form the filling if you like.

Enjoy!


ΚΡΟΥΑΣΑΝ ΜΗΛΟΠΙΤΑΚΙΑ ΧΩΡΙΣ ΓΛΟΥΤΕΝΗ

Μερίδες: 12         Χρόνος ψησίματος: 15 λεπτά     Βαθμός δυσκολίας: εύκολο

apple crescent

ΥΛΙΚΑ:

Για τη ζύμη:

Για τη γέμιση:

  • 2 κόκκινα μήλα,(ή ότι είδος μήλου θέλετε) καθαρισμένα και κομμένα σε μικρούς κύβους ή λεπτές φέτες
  • 1 κουταλιά της σούπας βούτυρο
  • 1/4 κούπας καστανή ζάχαρη
  • 1/4 κούπα βούτυρο αμυγδάλου
  • χυμός και ξύσμα από ένα πορτοκάλι
  • 1/2 κουταλάκι του γλυκού κανέλα σε σκόνη
  • 1/4 κουταλάκι του γλυκού φρέσκο τζίντζερ, τριμμένο
  • 1 κουταλάκι του γλυκού εκχύλισμα βανίλιας
  • 1/4 κουταλάκι του γλυκού μοσχοκάρυδο

Για πασπάλισμα:

  • 3 κουταλιές της σούπας βούτυρο,λιωμένο
  • κρυσταλλική ζάχαρη
  • κανέλα τριμμένη

ΕΚΤΕΛΕΣΗ:

  1. Προετοιμάστε τη ζύμη σύμφωνα με τις οδηγίες.
  2. Για να κάνουμε τη γέμιση: Σε μία μεσάια κατσαρόλα σε μέτρια φωτιά, προσθέτουμε το βούτυρο και το αφήνουμε να λιώσει, έπειτα προσθέστε τα κομματια μήλου,την κανέλα,το τζίντζερ,το μοσχοκάρυδο και την καστανή ζάχαρη. Ανακατεύουμε καλά μέχρι να μαλακώσουν τα μήλα και να καραμελώσουν ελάχιστα.
  3. Χαμηλώνουμε τη φωτιά,προσθέτουμε το βούτυρο αμυγδάλου (ή όποιο βούτυρο ξηρών καρπών θέλετε),τον χυμό και ξύσμα πορτοκαλιού και το εκχύλισμα βανίλιας. Ανακατεύουμε καλά για 5 περίπου λετά, μέχρι το μείγμα μας να σχηματίσει μικρές φουσκάλες στα τοιχώματα της κατσαρόλας και μέχρι να πήξει. Αποσύρουμε από τη φωτιά και το αφήνουμε να έρθει σε θερμοκρασία δωματίου.
  4. Προθερμαίνουμε το φούρνο στους 180 βαθμούς, στρώνουμε αντικολλητικό χαρτί σε ένα μεγάλο ορθογώνιο ταψί και το αφήνουμε στην άκρη.
  5. Για να σχηματίσουμε τα κρουασανάκια: (Η ζύμη μου είναι αρκετά ελαστική, λόγω του αλευρου χωρίς γλουτένη που χρησιμοποιώ. Όπως έχω πει σε προηγούμενες συνταγές, τα Αμερικάνικα αλεύρια χωρίς γλουτένη διαφέρουν από τα Ευρωπαϊκά.) Καλύψτε τον πάγκο εργασίας σας με καλής ποιότητας μεμβράνη και πασπαλίστε με αλεύρι χωρίς γλουτένη. 
    Τοποθετείστε τη ζύμη στο κέντρο και πασπαλίστε με λίγο ακόμη αλεύρι, αν χρειαστεί. Βάλτε ένα ακόμη κομμάτι μεμβράνης πάνω από τη ζύμη, και με τον πλάστη ανοίγουμε τη ζύμη σε κύκλο διαμέτρου περίπου 30 εκατ. και σιγά σιγά αφιαρούμε την πάνω μεμβράνη.  Κόβουμε σε 12  ισομερή τρίγωνα. Βάλτε 1 κουταλάκι του γλυκού από τη γέμιση και ξεκινώντας από την πλατιά μεριά του τριγώνου,τυλίγουμε. Τοποθετείστε τα στο ταψί. Συνεχίστε με τα υπόλοιπα και σκεπάστε με μία καθαρή πετσέτα για 15 περίπου λεπτά. Βουτυρώνουμε κάθε κρουασανάκι και πασπαλίζουμε με ζάχαρη και κανέλα.
  6. Ψήνουμε για 15-20 λεπτά, μέχρι να χρυσίσουν. Αν θέλετε, βάλτε λίγο από τη ″καραμελένια” γέμιση από πάνω.

Gluten free soft pretzels

Last week, I made my first ever pretzel. Never tried it before, so I had no clue how it supposed to taste. Luckily, my husband guided me on how is supposed to taste. Every time we go to the mall, he and Anna always get Aunt Annie’s soft pretzel bites, while I just stare. Yes, I know, is not as mature as is supposed to be.

Months ago, I tried to make some pretzels, but I failed miserably! Everything was wrong, the dough, the soda bathing… So, I gave up for a while until I get the urge of creating a dough, again.

Finally, I perfected my soft pretzels! I made small ones, topped half of them with coarse sea salt and the other half with shredded cheddar and finely chopped halapeño peppers. You can even make a sweet version, it’s entirely up to you!

The recipe has been updated. I apologize for the inconvenience!

soft pretzels


GLUTEN FREE SOFT PRETZELS

Makes: 6-8         Cooking time: 10-12 minutes           Difficulty: medium


INGREDIENTS:

• 2/3 cup milk, warm
• 1 tablespoons butter
• 1 teaspoon yeast
• ¼ cup light brown sugar
• 1 1/2- 2 cups gluten free all purpose flour, I used Cup4Cup*

• 2 teaspoons baking powder
• ½ teaspoon salt
• 1 large egg
• ¼ cup oil

Pretzel bath and baking

• 1 teaspoon kosher salt (or pretzel salt for dusting on pretzels)
• 4 tablespoons baking soda
• 2 cups boiling water
• 6 tablespoons butter, melted

DIRECTIONS:

  1.    Preheat oven to 375 F/180 C and line a large baking sheet or two baking sheets with parchment paper.
  2.  Combine yeast with warm milk and sugar in the bowl of your stand mixer fitted with paddle attachment. In a medium bowl, mix flour and baking powder.
  3. Once the mixture becomes “frothy” your yeast is ready. Usually it takes 5-10 minutes. Stir in salt and 1 tbs of melted butter, oil, and egg. Add flour mixture gradually until a dough forms and is no longer sticky. You may need more or less depending on temperature differences and knead dough for 5 more minutes until smooth and pliable. The dough might be a bit sticky, which is ok. Cover bowl with lightly plastic wrap and set in a warm, draft-free location to rise until nearly doubled in size (about 40 minutes).
  4.  While dough is resting, prepare a baking soda bath.  In a medium-sized pot, boil water with baking soda. Once the baking soda is mostly dissolved, take the mixture off the heat and allow it to come down to a lukewarm temperature. Pour into a 9×9 (22 cm) baking dish once cooled down.
  5.  Take dough out of the bowl and flatten slightly with the palm of your hand. I prefer kneading the dough in a lightly floured silicone pad. After kneading grease the silicone pad and gently fold with a rubber spatula or greased hands. Cut dough into 8 sections. Roll each triangle into a long, thin rope, about 12 inches 930 cm) long. Shape into a pretzel by twisting both ends of the rope into a pretzel shape, crisscrossing them once, and then crossing one end over another in an X. Tuck the ends of the X behind the bottom of the pretzel shape and press gently but firmly to seal and place in baking soda bath for 2 minutes.
  6. Once the 2 minutes are up, carefully pick pretzel up either by your hand or with the help of a fork and place on prepared baking sheet.
  7. You may have to re-shape slightly. Sprinkle the pretzel with coarse salt or some cheddar cheese while still wet (optional). Repeat these steps until all pretzels are prepared and place them 2 inches apart from one another and on the baking sheet(s).
  8.  Brush generously with melted butter and bake pretzels for 8-9 minutes or until golden brown.

*NOTE & UPDATE: I prefer Cup4Cup because of its texture and the elasticity it gives. I haven’t tried with different gluten free flour brand, so the results may vary and be different. Some people experienced different results, the amount of flour was updated as well. 


ΜΑΛΑΚΑ ΠΡΕΤΖΕΛ ΧΩΡΙΣ ΓΛΟΥΤΕΝΗ

Μερίδες: 6-8         Χρόνος ψησίματος: 10-12 λεπτά           Βαθμός δυσκολίας: μέτριος

Μαλακά, αφράτα πρέτζελ ψωμάκια με χοντρό αλάτι ή τσένταρ και καυτερή πιπεριά. Μπορείτε να τα πασπαλίσετε με ότι εσείς επιθυμείτε!

pan soft pretzels

ΥΛΙΚΑ:

• 2/3 κούπας γάλα, ζεστό
• 1 κουταλιά της σούπας βούτυρο
• 1 κουταλιά του γλυκού ξηρή μαγιά, χωρίς γλουτένη
• ¼ κούπας καστανή ζάχαρη
• 1 1/4-2 κούπες (περίπου 200 γραμμ) αλεύρι για όλες τις χρήσεις, χωρίς γλουτένη( ή για ζύμες)
• 2½ κουταλάκι του γλυκού μπέικιν πάουντερ
• ½ κουταλάκι του γλυκού αλάτι
• 1 μεγάλο αυγό
• ¼κούπας ηλιέλαιο

Για το «μπάνιο» και το ψήσιμο

• 1 κουταλάκι του γλυκού χοντρό ή ημίχοντρο αλάτι
• 4 κουταλιές της σούπας μαγειρική σόδα
• 2 κούπες βραστό νερό
• 6 κουταλιές της σούπας ανάλατο βούτυρο, λιωμένο

ΕΚΤΕΛΕΣΗ:

  1.  Προθερμαίνουμε το φούρνο στους 180 βαθμούς και στρώνουμε ένα ή δύο μεγάλα μακροστενα ταψιά με  αντικολλητικό χαρτί.
  2.  Στο μπωλ του σταθερού μας μίξερ, με το γάτζο (εξάρτημα για ζύμες) συνδυάζουμε το χλιαρό γάλα με τη μαγιά και τη ζάχαρη και αφήνουμε για 5 περίπου λεπτά.
  3. Μόλις σχηματιστούν ἁφροί στο μείγμα μας , τοτε η μαγια είναι έτοιμη. Προσθέτουμε το αλάτι και 1 κουταλιά της σούπας λιωμένο βούτυρο και το αυγό. Προσθέτουμε το αλεύρι σταδιακά (Ισως χρειαστεί λιγότερο ή περισσότερο, ανάλογα με το αλεύρι) και αφήνουμε να ζυμωθει για 5 πρίπου λεπτά σε μέτρια ταχύτητα, μέχρι η να σχηματιστεί μία απαλή και εύπλαστη μπάλα ζύμης, χωρίς να κολλάει. Αν κολλάει ελάχιστα, δεν πειράζει.
  4. Σκεπάζουμε το μπωλ με πλαστική μεμβράνη και αφήνουμε να φουσκώσει σε ένα ζεστό μέρος μέχρι να διπλασιαστεί σε όγκο 9περίπου 40 λεπτά).
  5.  Όσο ξεκουράζεται η ζύμη, ετοιμάζουμε το  μπάνιο με τη μαγειρική σόδα. Σε μία μέτρια κατσαρόλα, βράστε τις 2 κούπες νερό, με τη μαγειρική σόδα. Μόλις λιώσει η μαγειρική σόδα, αποσύρετε την κατσαρόλα από τη φωτιά και αφήστε το να έρθει σε χλιαρεί θερμοκρασία. Μόλις το νερόμας έρθει στην κατάλληλη θερμοκρασία, ρίξτε το σε ένα ταψί 22 εκ.
  6.  Βγάλτε τη ζύμη από το μπωλ και με την παλάμη σας ανοίξετε και απλώστε τη ζύμη . Κόψτε τη ζύμη σε 8 κομμάτια. Πάρτε ένα κομμάτι ζύμης και πλάστε ένα μακρόστενο μπαστούνι,σαν λεπτό σχοινι, περίπου 30 εκ. Σχηματίστε το γράμμα υ και πάρτε την κάθε άκρη της ζύμης, στρίψτε το μία φορα και γυρίστε το προς τα μέσα σχηματίζοντας ένα χ και πατήστε τις άκρες ελαφρά και ρίξτε το στο χλιαρό μπάνιο με τη μαγειρική σόδα.
  7. Μόλις τελειώσουν τα 2 λεπτά, προσεκτικά πέρνουμε το πρέτζελ και το βάζουμε στο ταψί με το αντικολλητικό χαρτί.
  8. Ίσως χρειαστεί να φτιάξετε λιγάκι το σχήμα του. Πασπαλίστε με το χοντρό αλάτι ή τριμμένο τυρί τσένταρ, όσο είναι ακόμα υγρό. Επαναλάβετε με τα υπόλοιπα, και τοποθετείστε τα στο ταψί με 5 εκατοστά απόσταση το ένα με το άλλο.
  9.  Αλείψτε με το λιωμένο βούτυρο και ψήστε για 8-9 λεπτά μέχρι να χρυσίσουν.

Gluten free banana pancakes

There is a love-hate relationship with pancakes. Once they get cold, there almost inedible! I love them when hot, drizzled with maple syrup or my healthy version of chocolate ganache and almond butter butterscotch. Oh my goodness!

Last week, my trusty little assistant and I, made pancakes. But not any kind of pancakes but banana pancakes. That was my last minute improv, because I ran out of eggs and I substitute eggs with bananas. The results? Stunning and heavenly delicious!

Enjoy a stack of thick and fluffy gluten free pancakes, with a fruity fragrant banana flavor! Healthy and delicious breakfast.


pan cakes

pancake toppings


pancakes


GLUTEN FREE BANANA PANCAKES

Makes: 10-12             Cooking time: 15 minutes        Difficulty: easy

Inspired by My thrive magazine

INGREDIENTS:

  • 1 3/4 cup gluten free all purpose flour
  • 1½ tbsp baking powder
  • ¼ tsp salt
  • ¾ -1 cup almond milk
  • 1 medium mashed banana (1/3 cup)
  • 3 tbsp coconut sugar
  • 1 tsp vanilla extract
  1. INSTRUCTIONS:
    In a large bowl, mix dry ingredients until well combined. Make a well in the center and stir in the wet ingredients (including mashed banana) and whisk until well combined.
  2. Heat a lightly oiled pan over mdeium high heat.
  3. Pour approximately 1/4 cup of the batter for each pancake. Spread batter with a spoon to make a thinner style pancake. Cook until bubbles form, then flip and cook for another 1-2 minutes, until lightly browned.
  4. Top them with delicious, homemade Vegan chocolate ganache or vegan butterscotch

ΑΦΡΑΤΕΣ ΤΗΓΑΝΙΤΕΣ ΜΠΑΝΑΝΑΣ (ΧΩΡΙΣ ΓΛΟΥΤΕΝΗ, ΒΙΓΚΑΝ ΕΠΙΛΟΓΗ)

Μερίδες: 10–12         Χρόνος ψησίματος: 15 λεπτά     Βαθμός δυσκολίας: εύκολο

Εύκολες, υγιεινές, νόστιμες και αφράτες Αμερικάνικες τηγανίτες μπανάνας χωρίς γλουτένη με γεύση μπανάνα. Κατάλληλο για μικρά και μεγάλα παιδιά!

pancakes

ΥΛΙΚΑ:

  • 1 3/4 κούπα αλεύρι χωρίς γλουτένη
  • 1½ κουταλιά της σούπας μπέικιν πάουντερ
  • ¼ κουταλάκι του γλυκού αλάτι
  • ¾ -1 κούπα γάλα αμυγδάλου ή κανονικό
  • 1 μέτρια μπανάνα λιωμένη (1/3 κούπα)
  • 3 κουταλιές της σούπας ζάχαρη καρύδας ή κανονική
  • 1 κουταλάκι του γλυκού εκχύλισμα βανίλιας

ΟΔΗΓΙΕΣ:

  1. Σε ένα μεγάλο μπωλ, ανακατεύουμε τα ξηρά υλικά. Κάνουμε μια λακούβα στο κέντρο και προσθέτουμε τα υγρά υλικά (συμπεριλαμβανομένης και της λιωμένης μπανάνας) και ανακατεύουμε μέχρι να ομογενοποιηθεί  το μείγμα.
  2. Ζεσταίνουμε ένα ελαφρώς βουτυρωμένο αντικολλητικό τηγάνι σε μέτρια προς υψηλή φωτιά.
  3. Ρίχνουμε περίπου 1/4 κούπας από το μείγμα μας στο τηγάνι. Με ένα κουτάλι απλώνουμε ελαφρά για πιο λεπτή τηγανίτα. Ψήνουμε μέχρι να σχηματιστούν φουσκάλες από τη μία μεριά, γυρίζουμε από την άλλη μεριά και συνεχίζουμε το ψήσιμο για  ακόμη 1-2 λεπτά, μέχρι να καφετίσουν λιγάκι.
  4. Γαρνίρουμε με πεντανόστιμη και σπιτική  Vegan σοκολάτα ganache ή vegan butterscotch

pan cakes